Mentality Polish: Raucous and Suede Swatches

Image

I recently had the extreme pleasure of trying some Mentality polish for the first time. It was an amazing experience, and one that I plan to repeat over and over. Mentality is run by a husband and wife team out of their home. I think that is freakin’ awesome. Seriously? I wish I could get my husband on board for something like that. I think it’s refreshing to see a husband and wife sharing something like this.

The thing that drew me to Mentality was the beautiful matte shades they offer. But these shades aren’t just simply matte, they are shimmery AND matte. It’s hard to explain, but when you glide these colors over your nails, you will see what I mean. Besides mattes, they also offer a large variety of beautiful holo shades, as well as some very unique top coats. The polishes are 4 free, and are very VERY affordable. Most 15 ml (0.5 oz) bottles sell for $6.50, and they have several package deals where you can get 5 bottles for $30 dollars. Guess what else? Are you ready for this? Shipping is FREE to the US!!! International shipping rates vary by country. Their online store is simple and easy to navigate allowing you to focus your attention on the polish. You’ve really just got to visit the store to see for yourself. I could go on and on about this polish, but instead I’ll show you some pictures!

Image

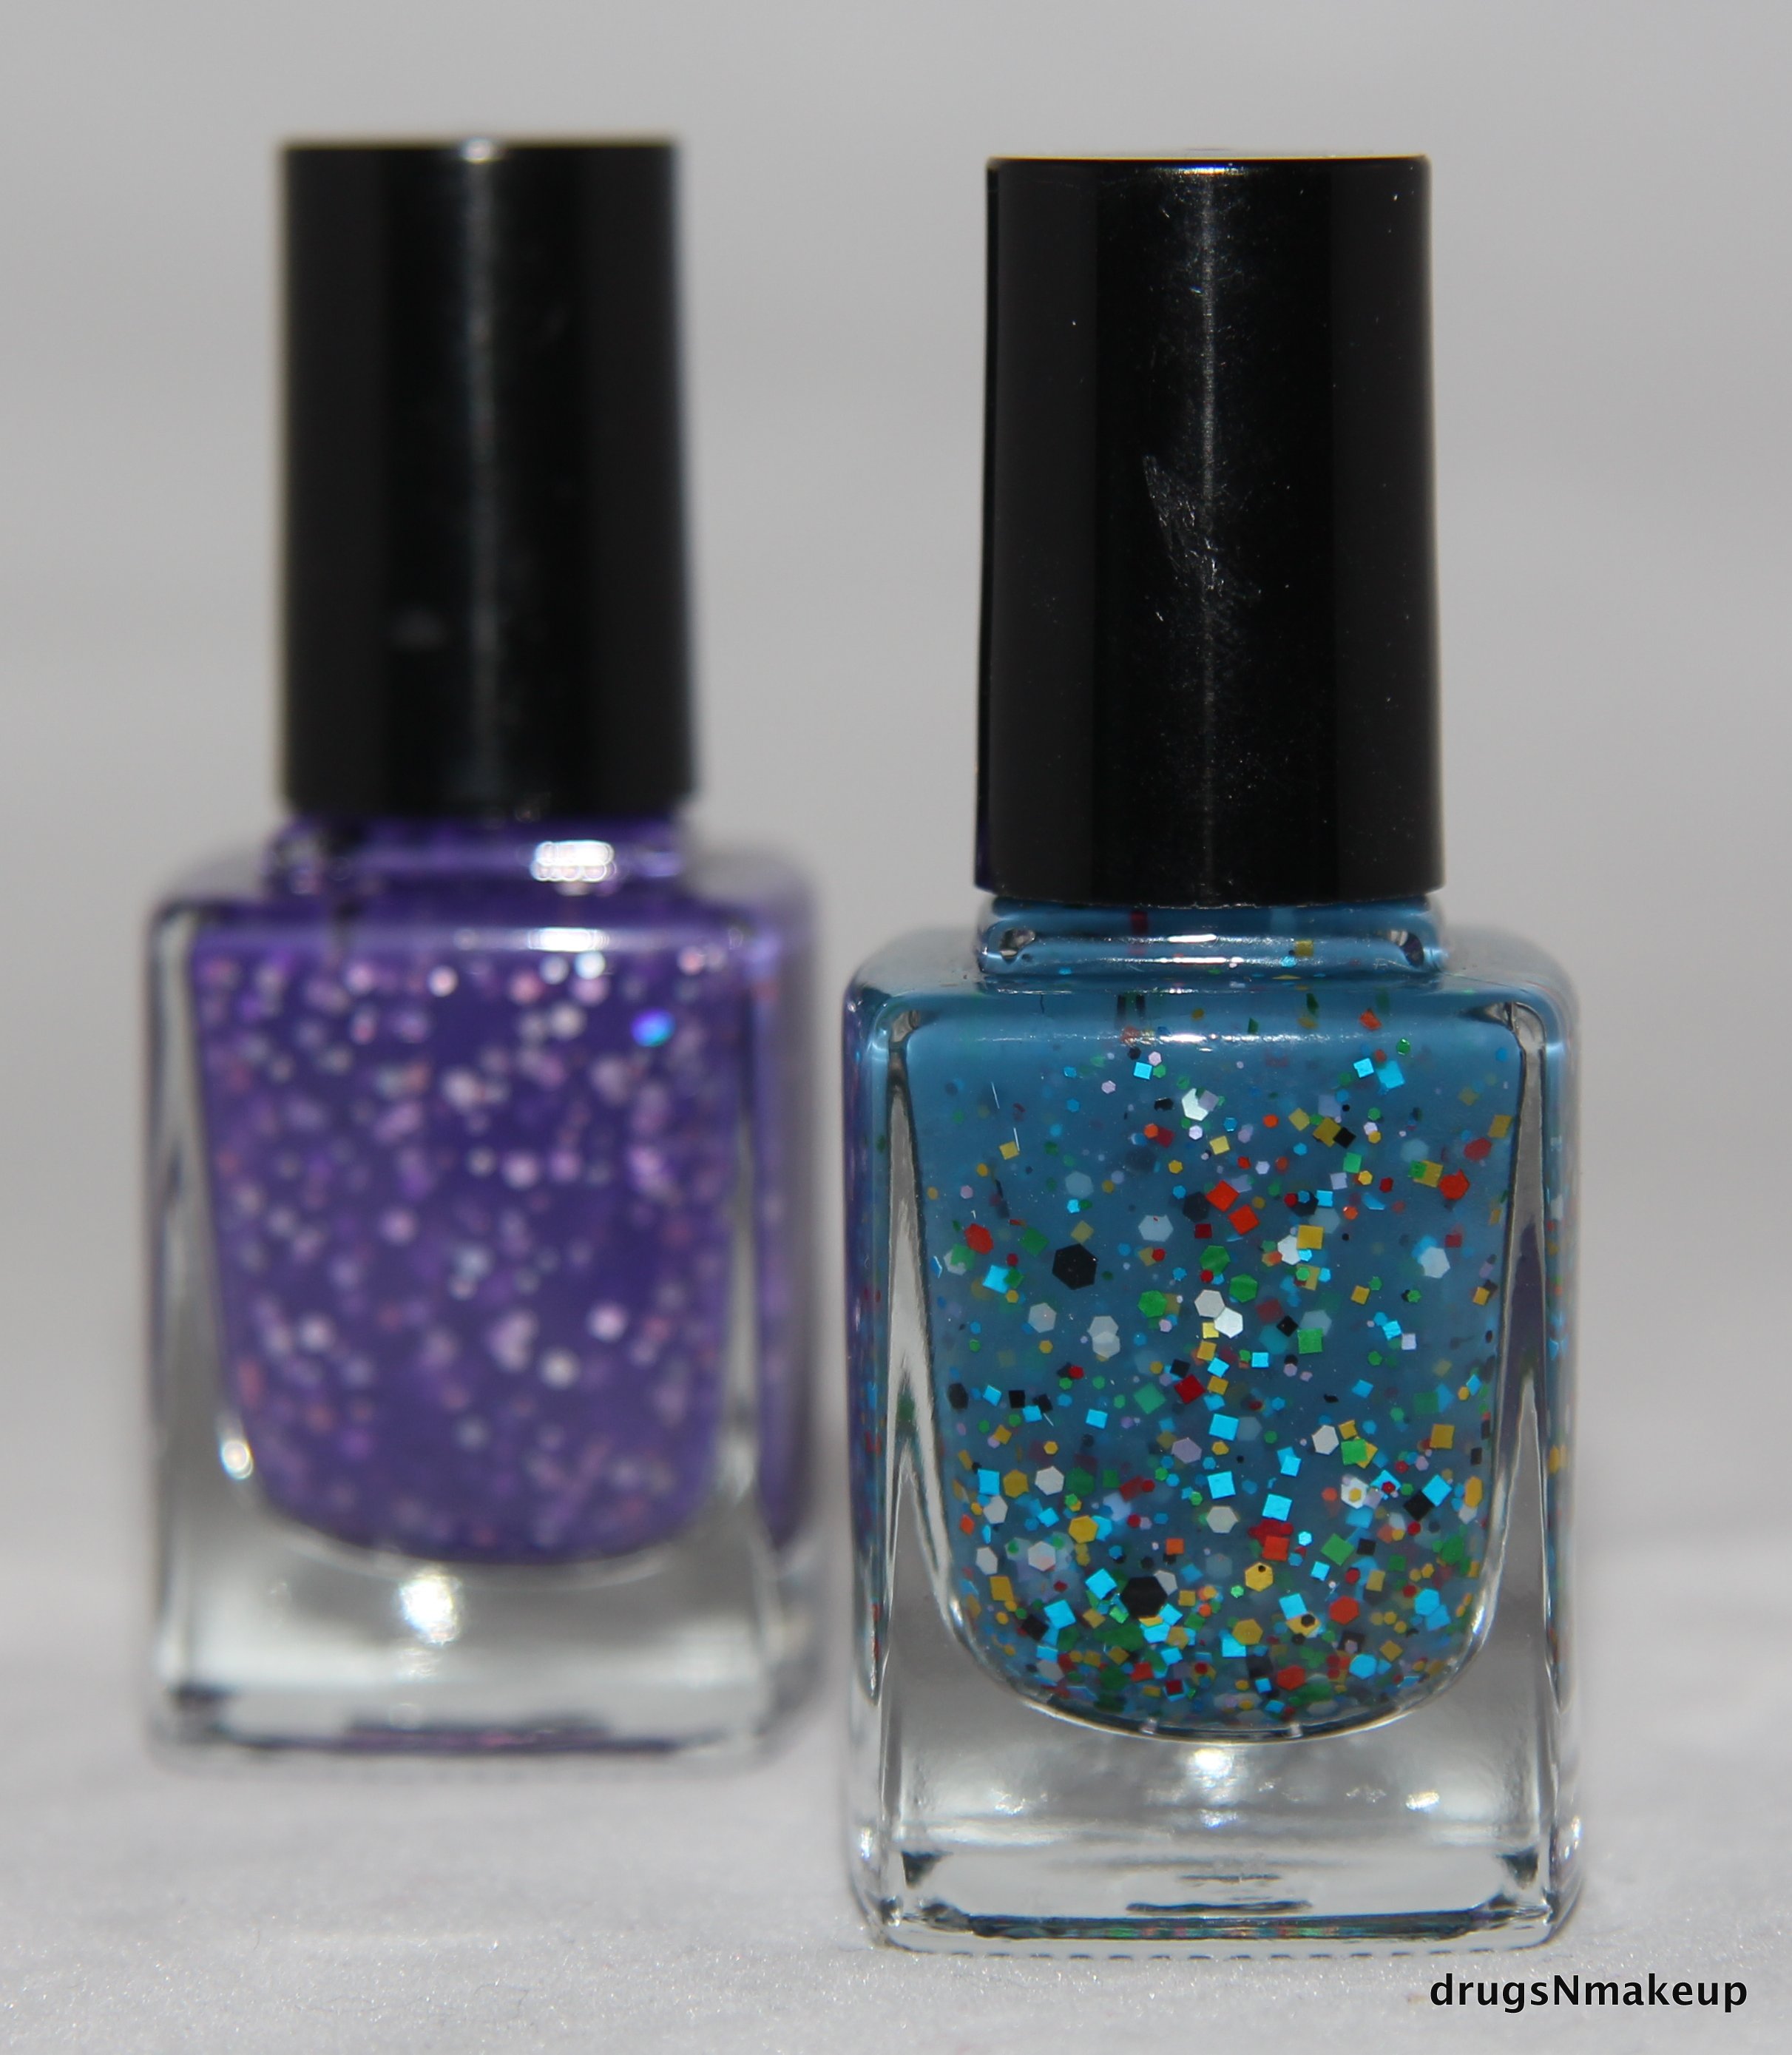
I tried Raucous from the Matte collection, and Suede, from the top coat collection.

Image

Image

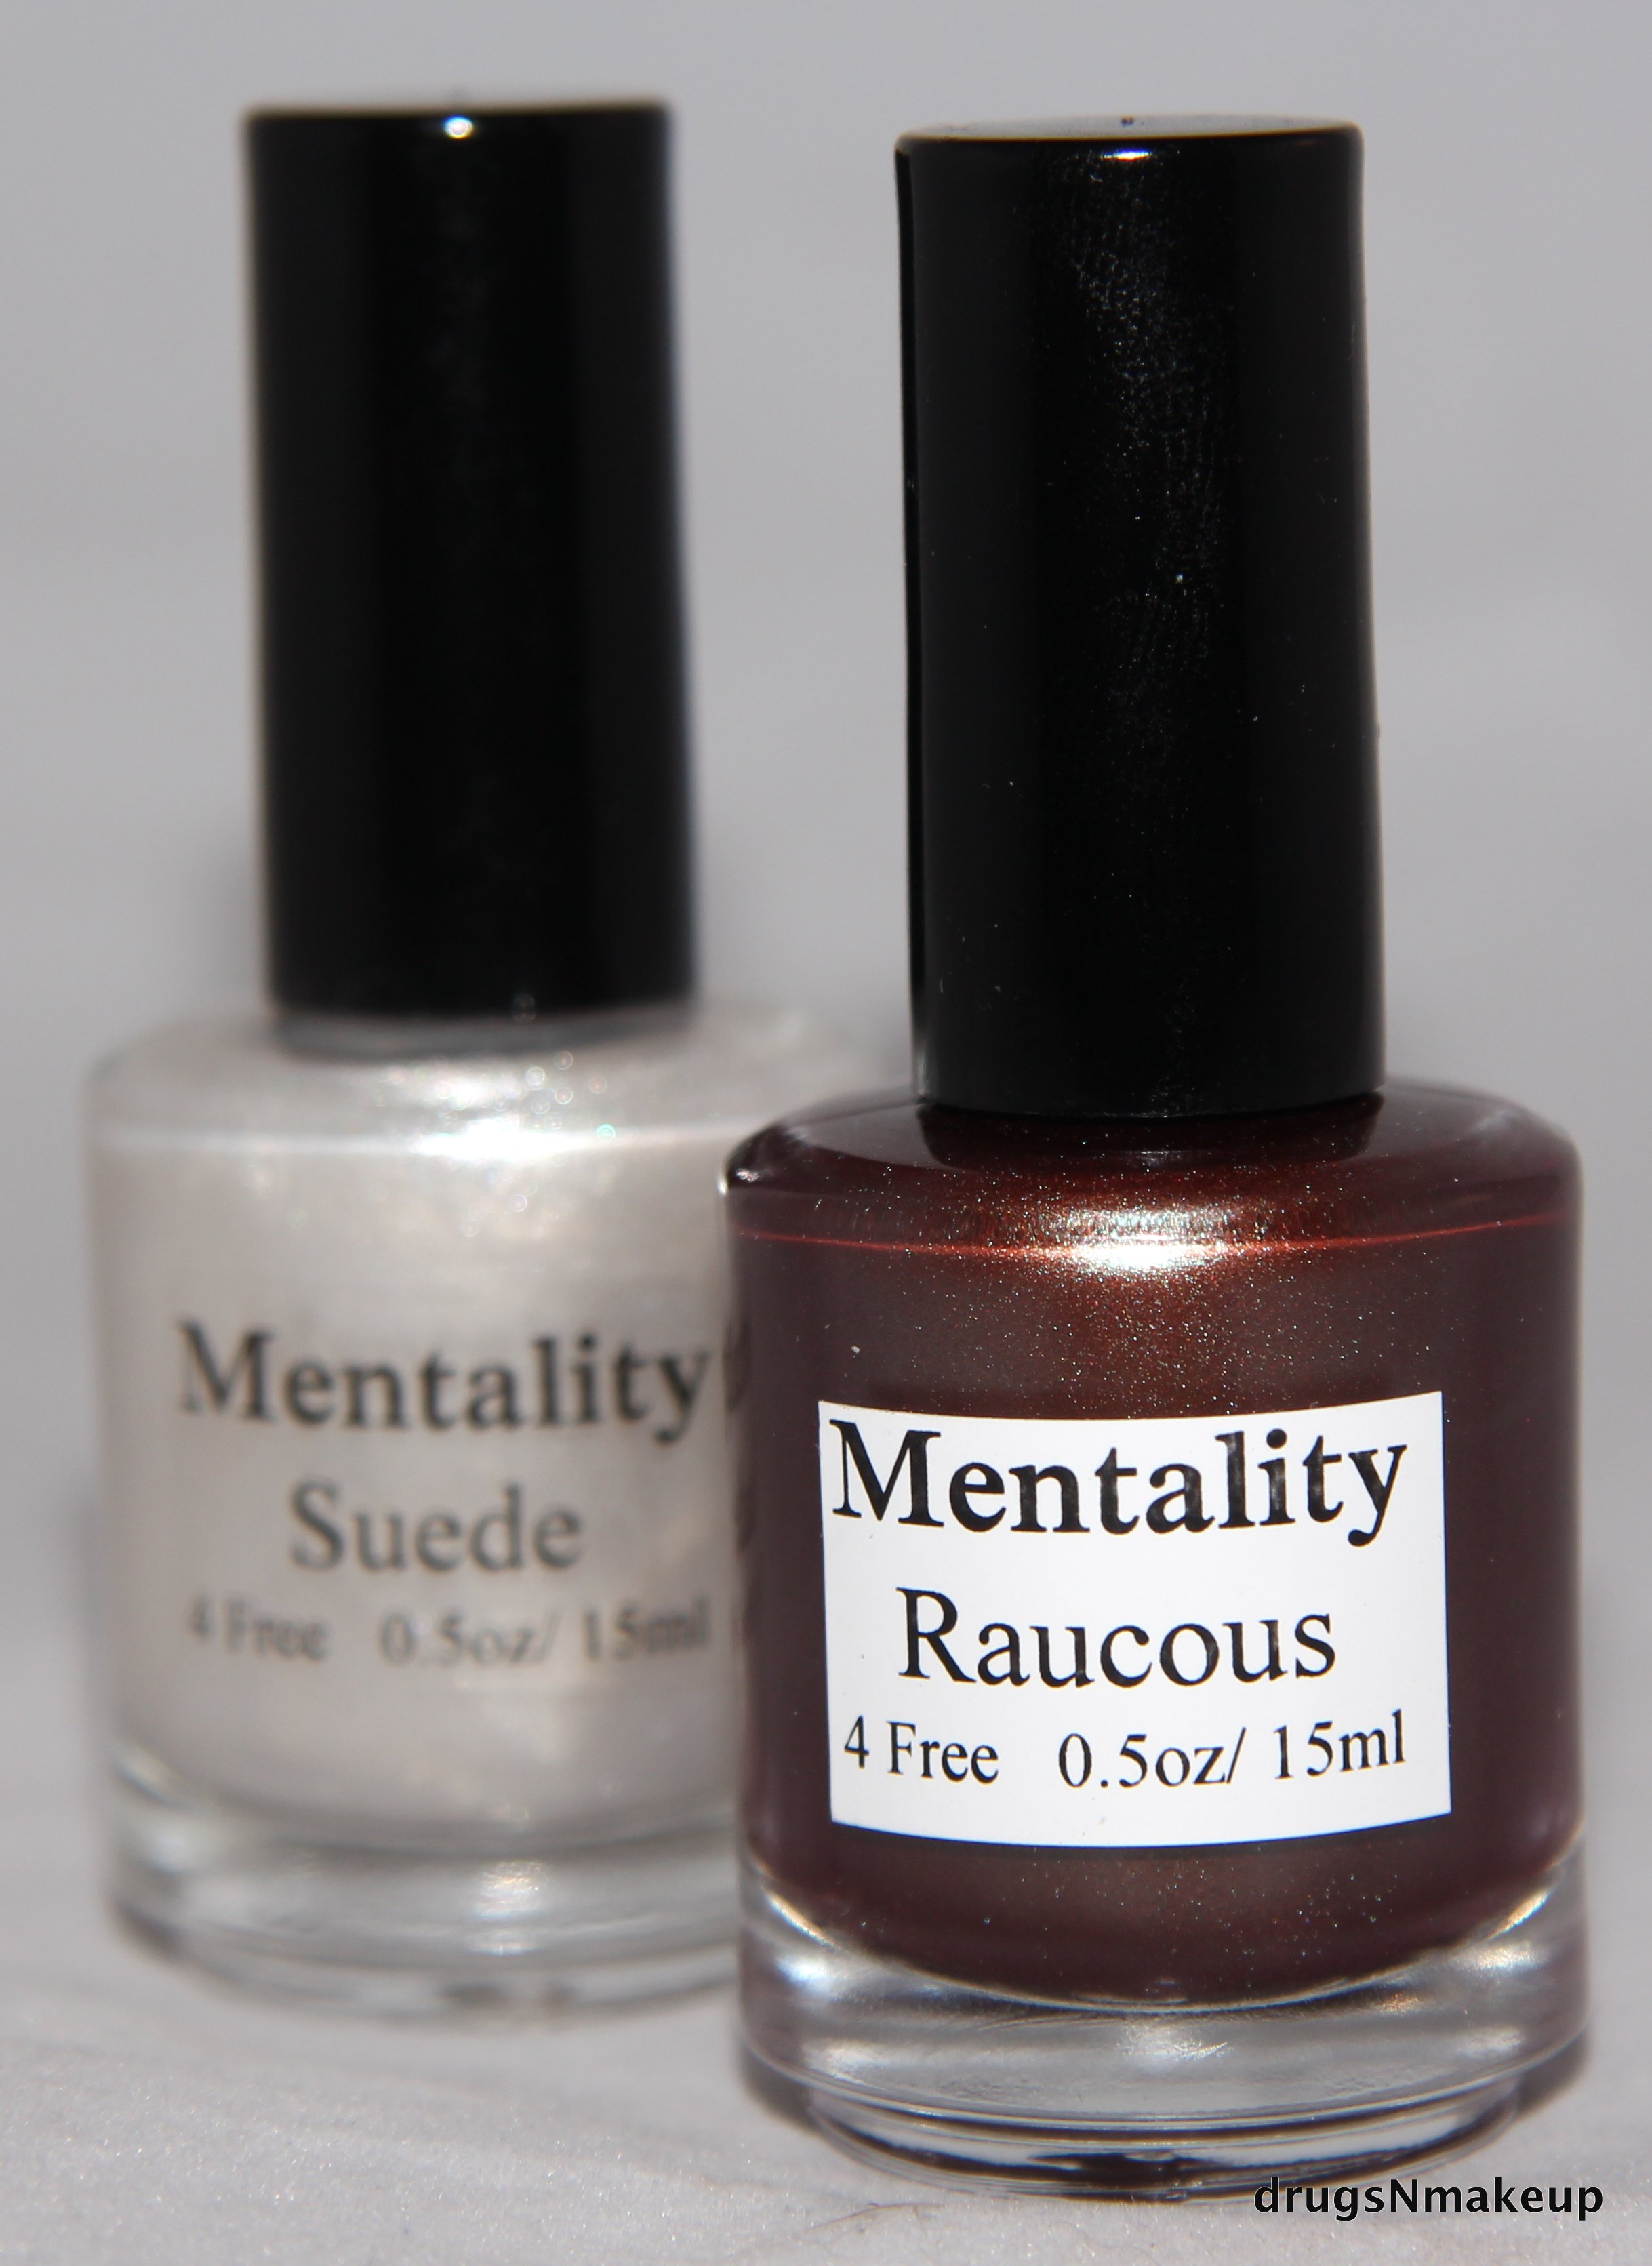
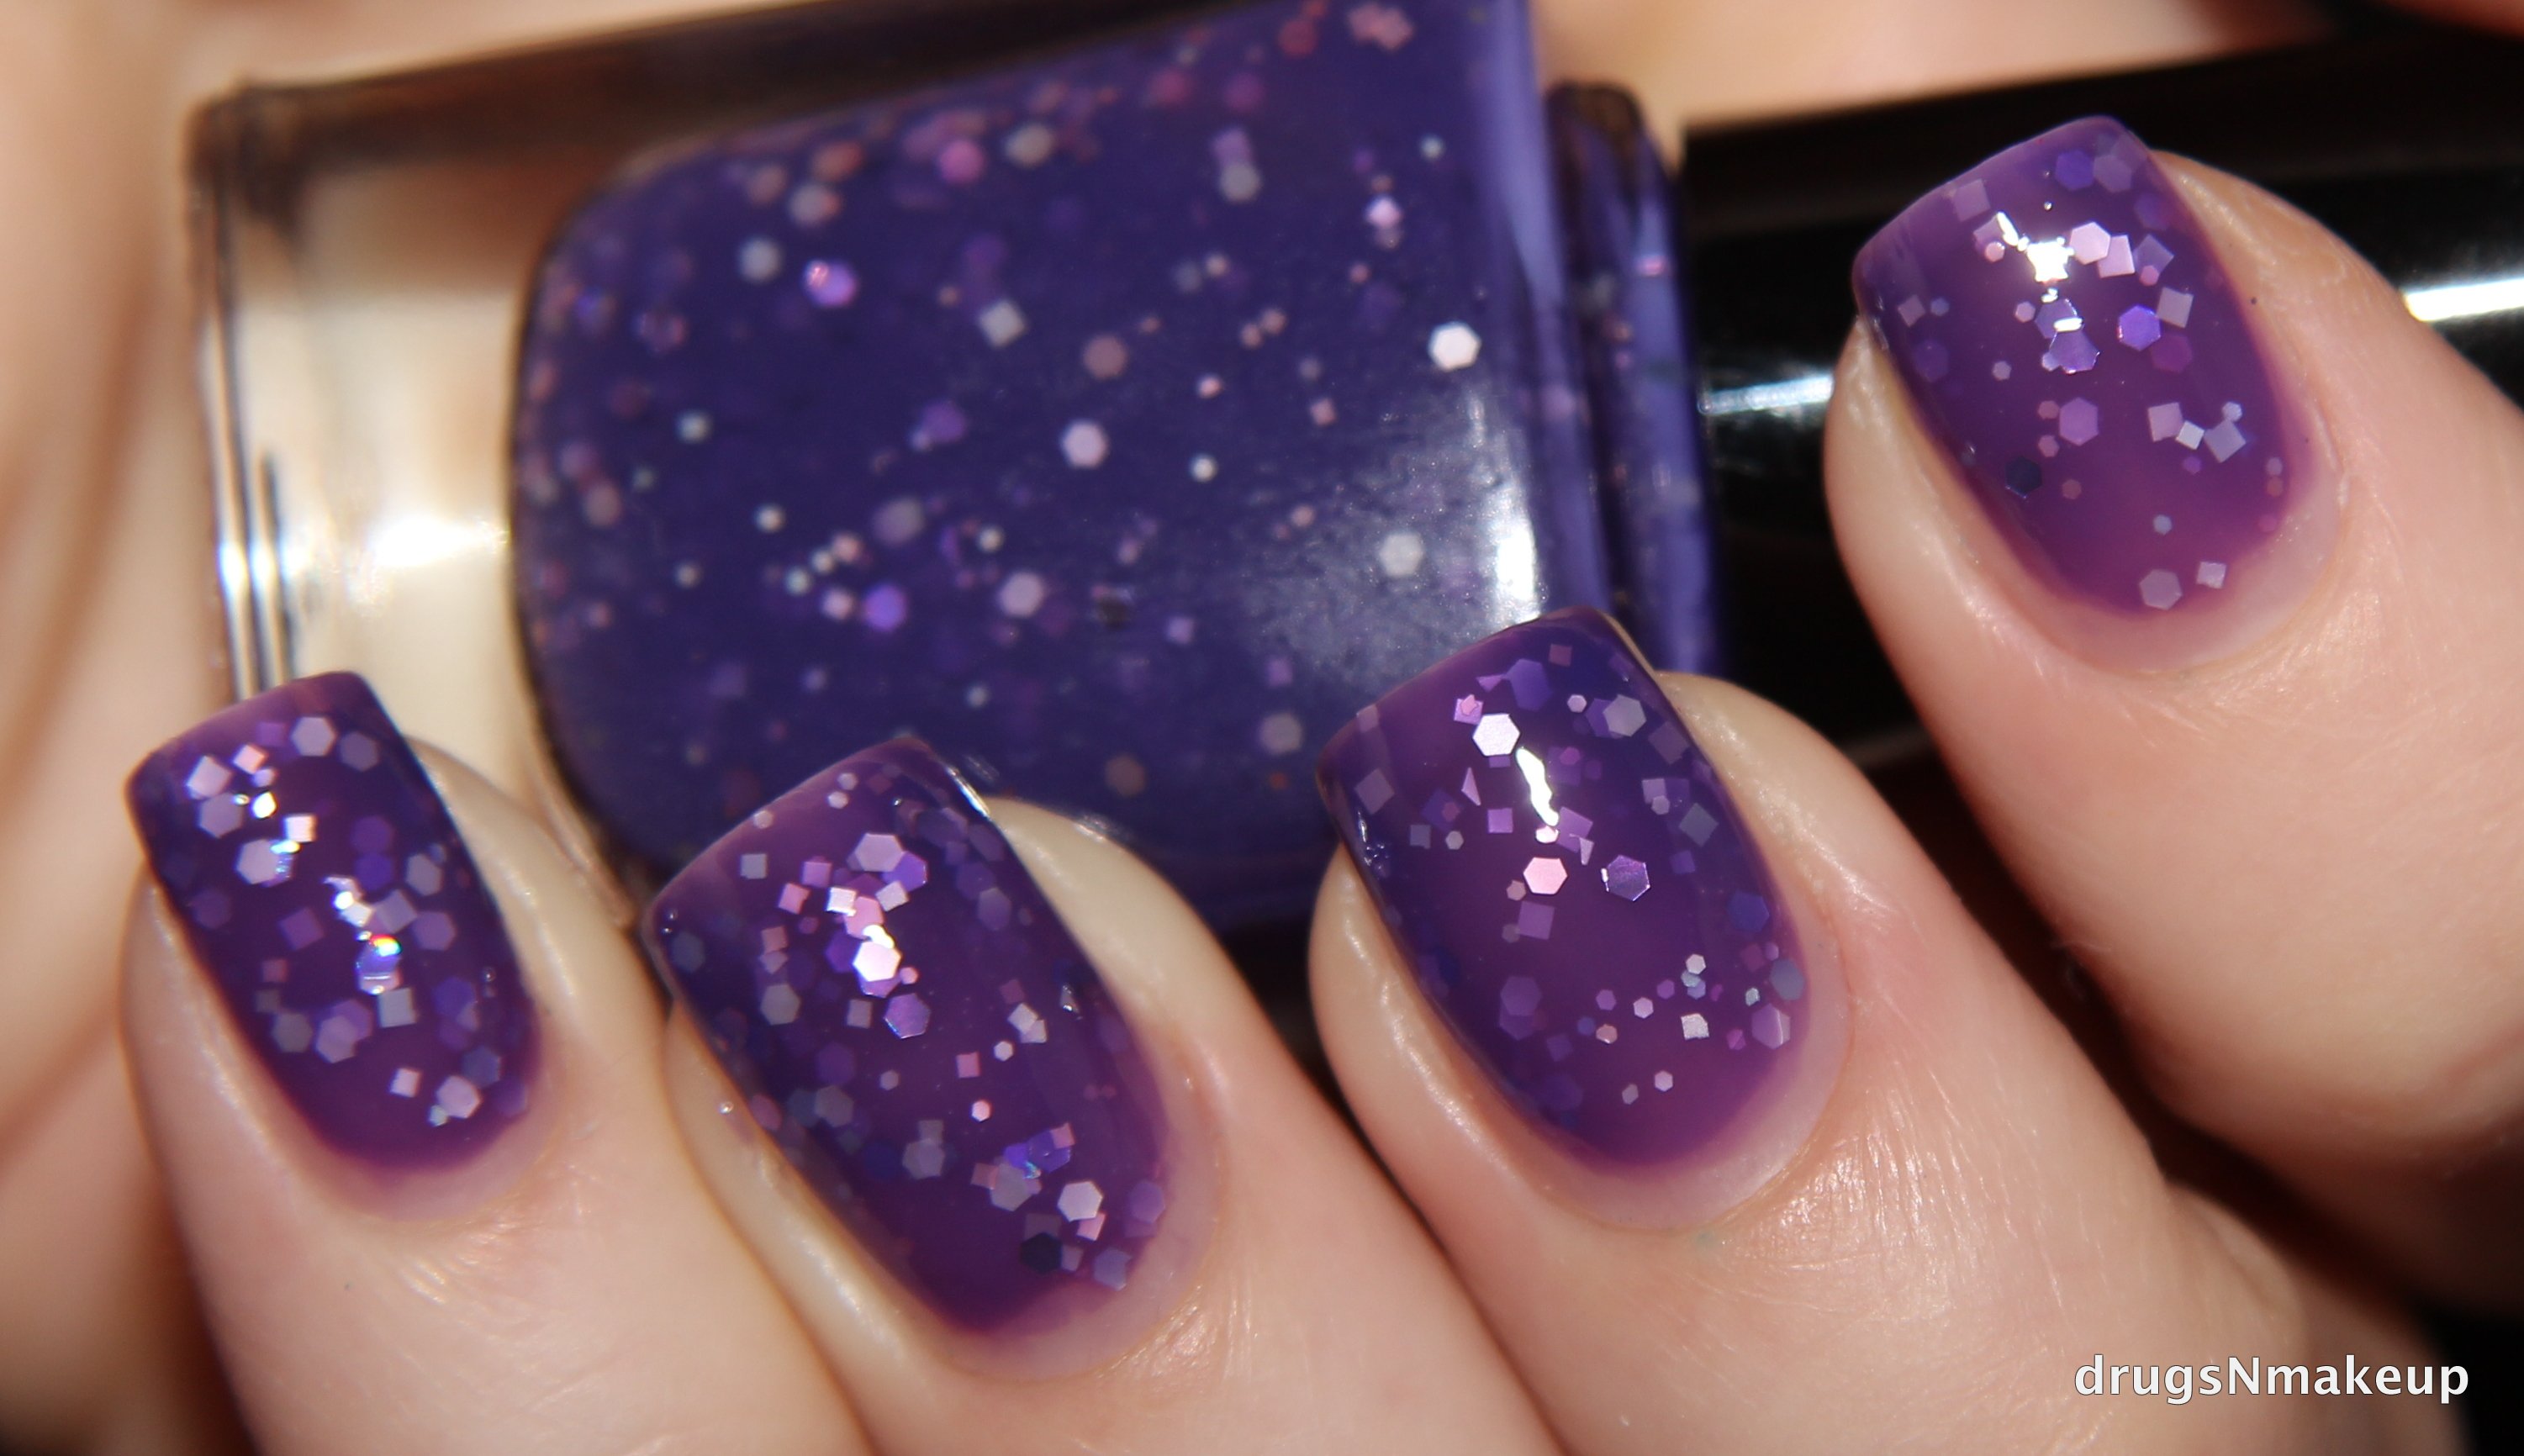
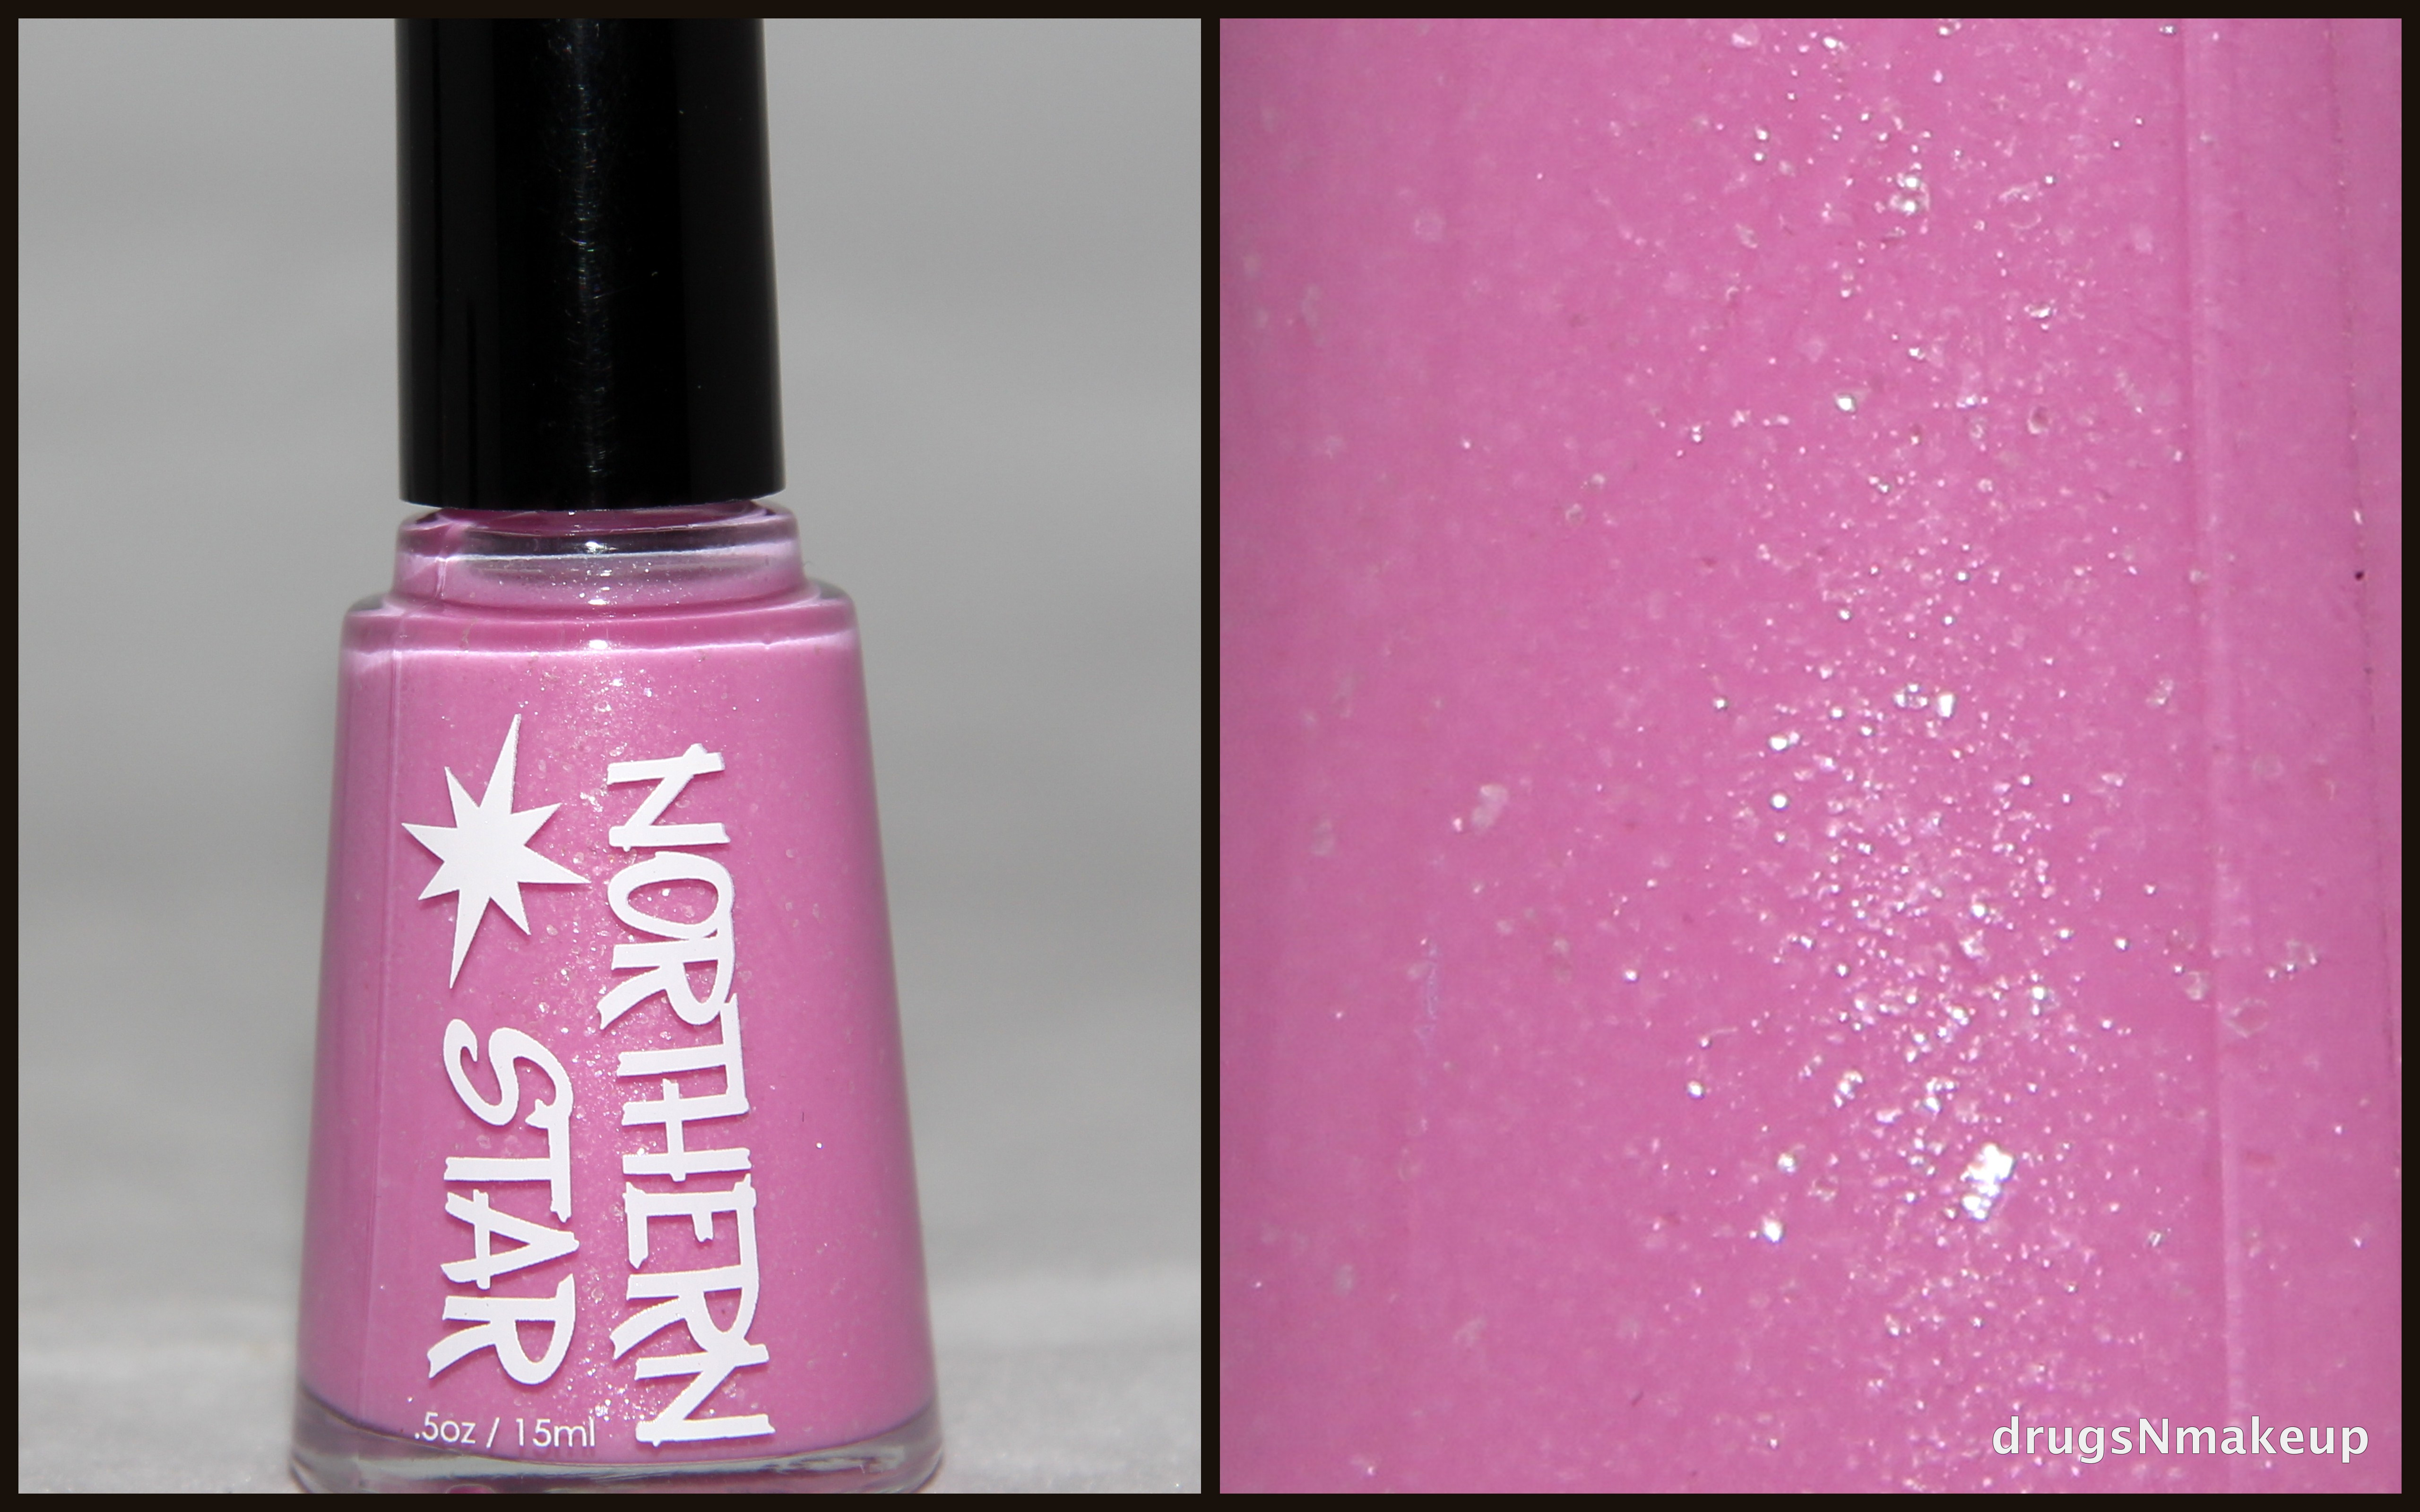
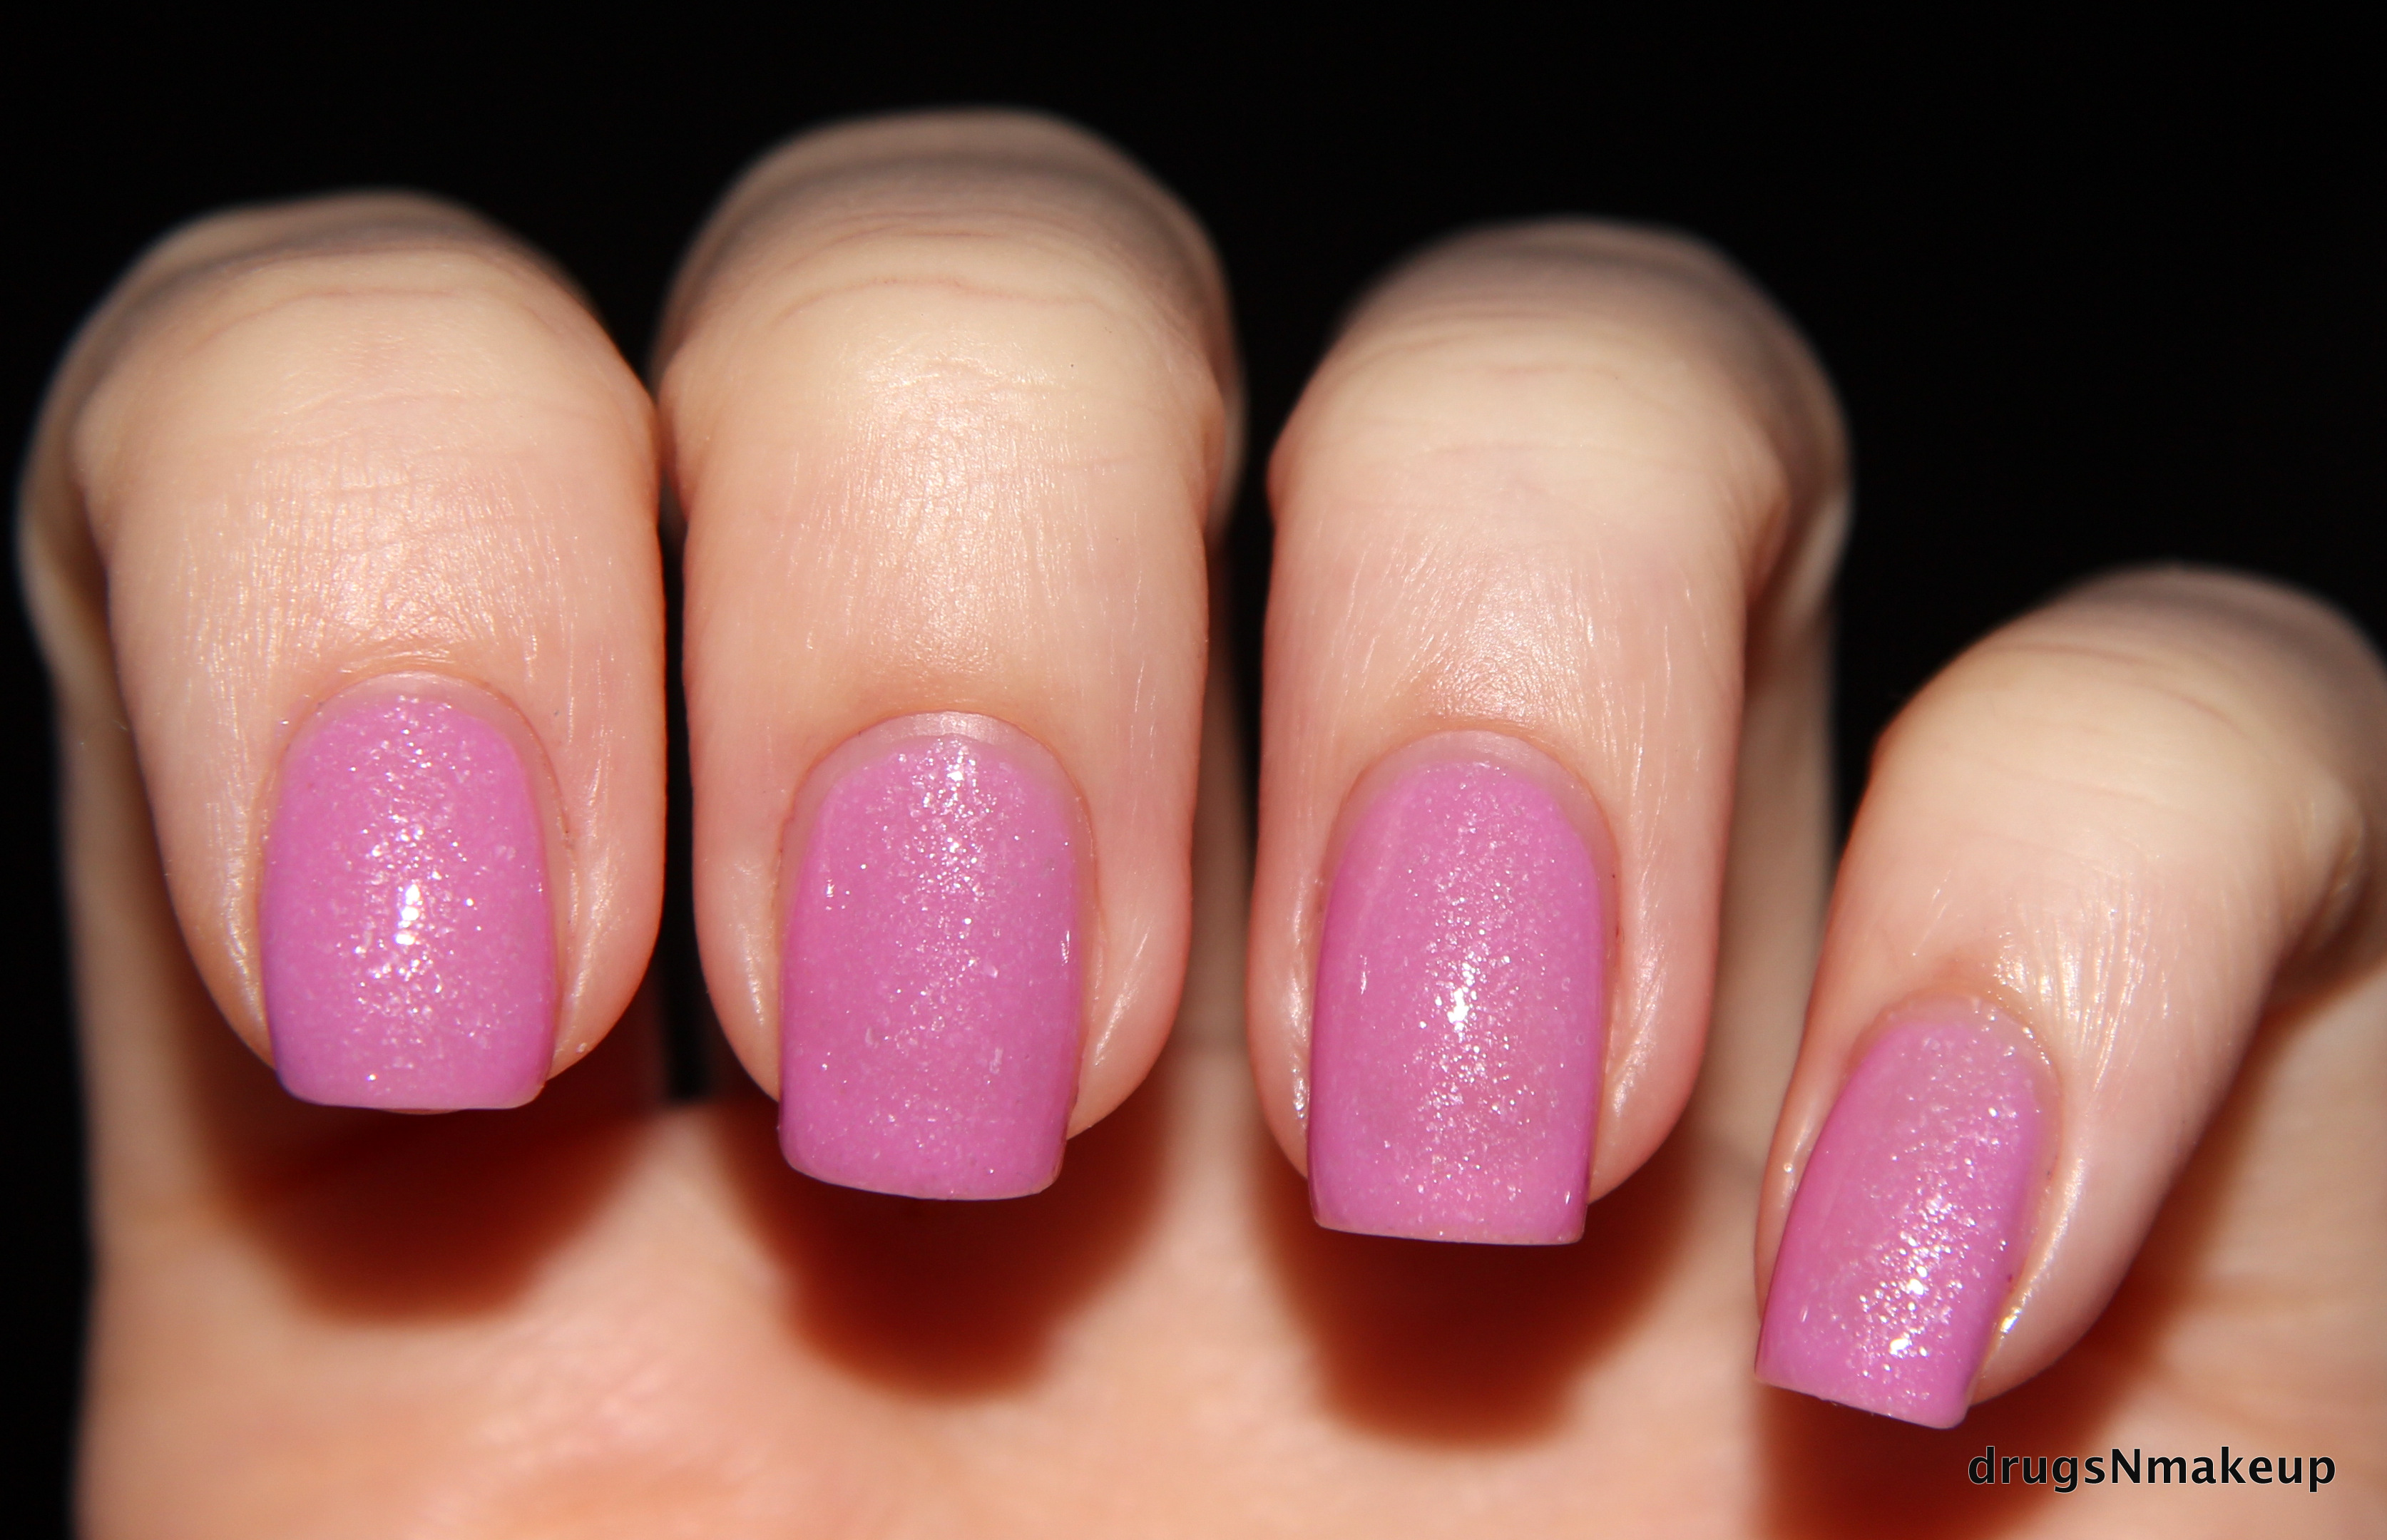
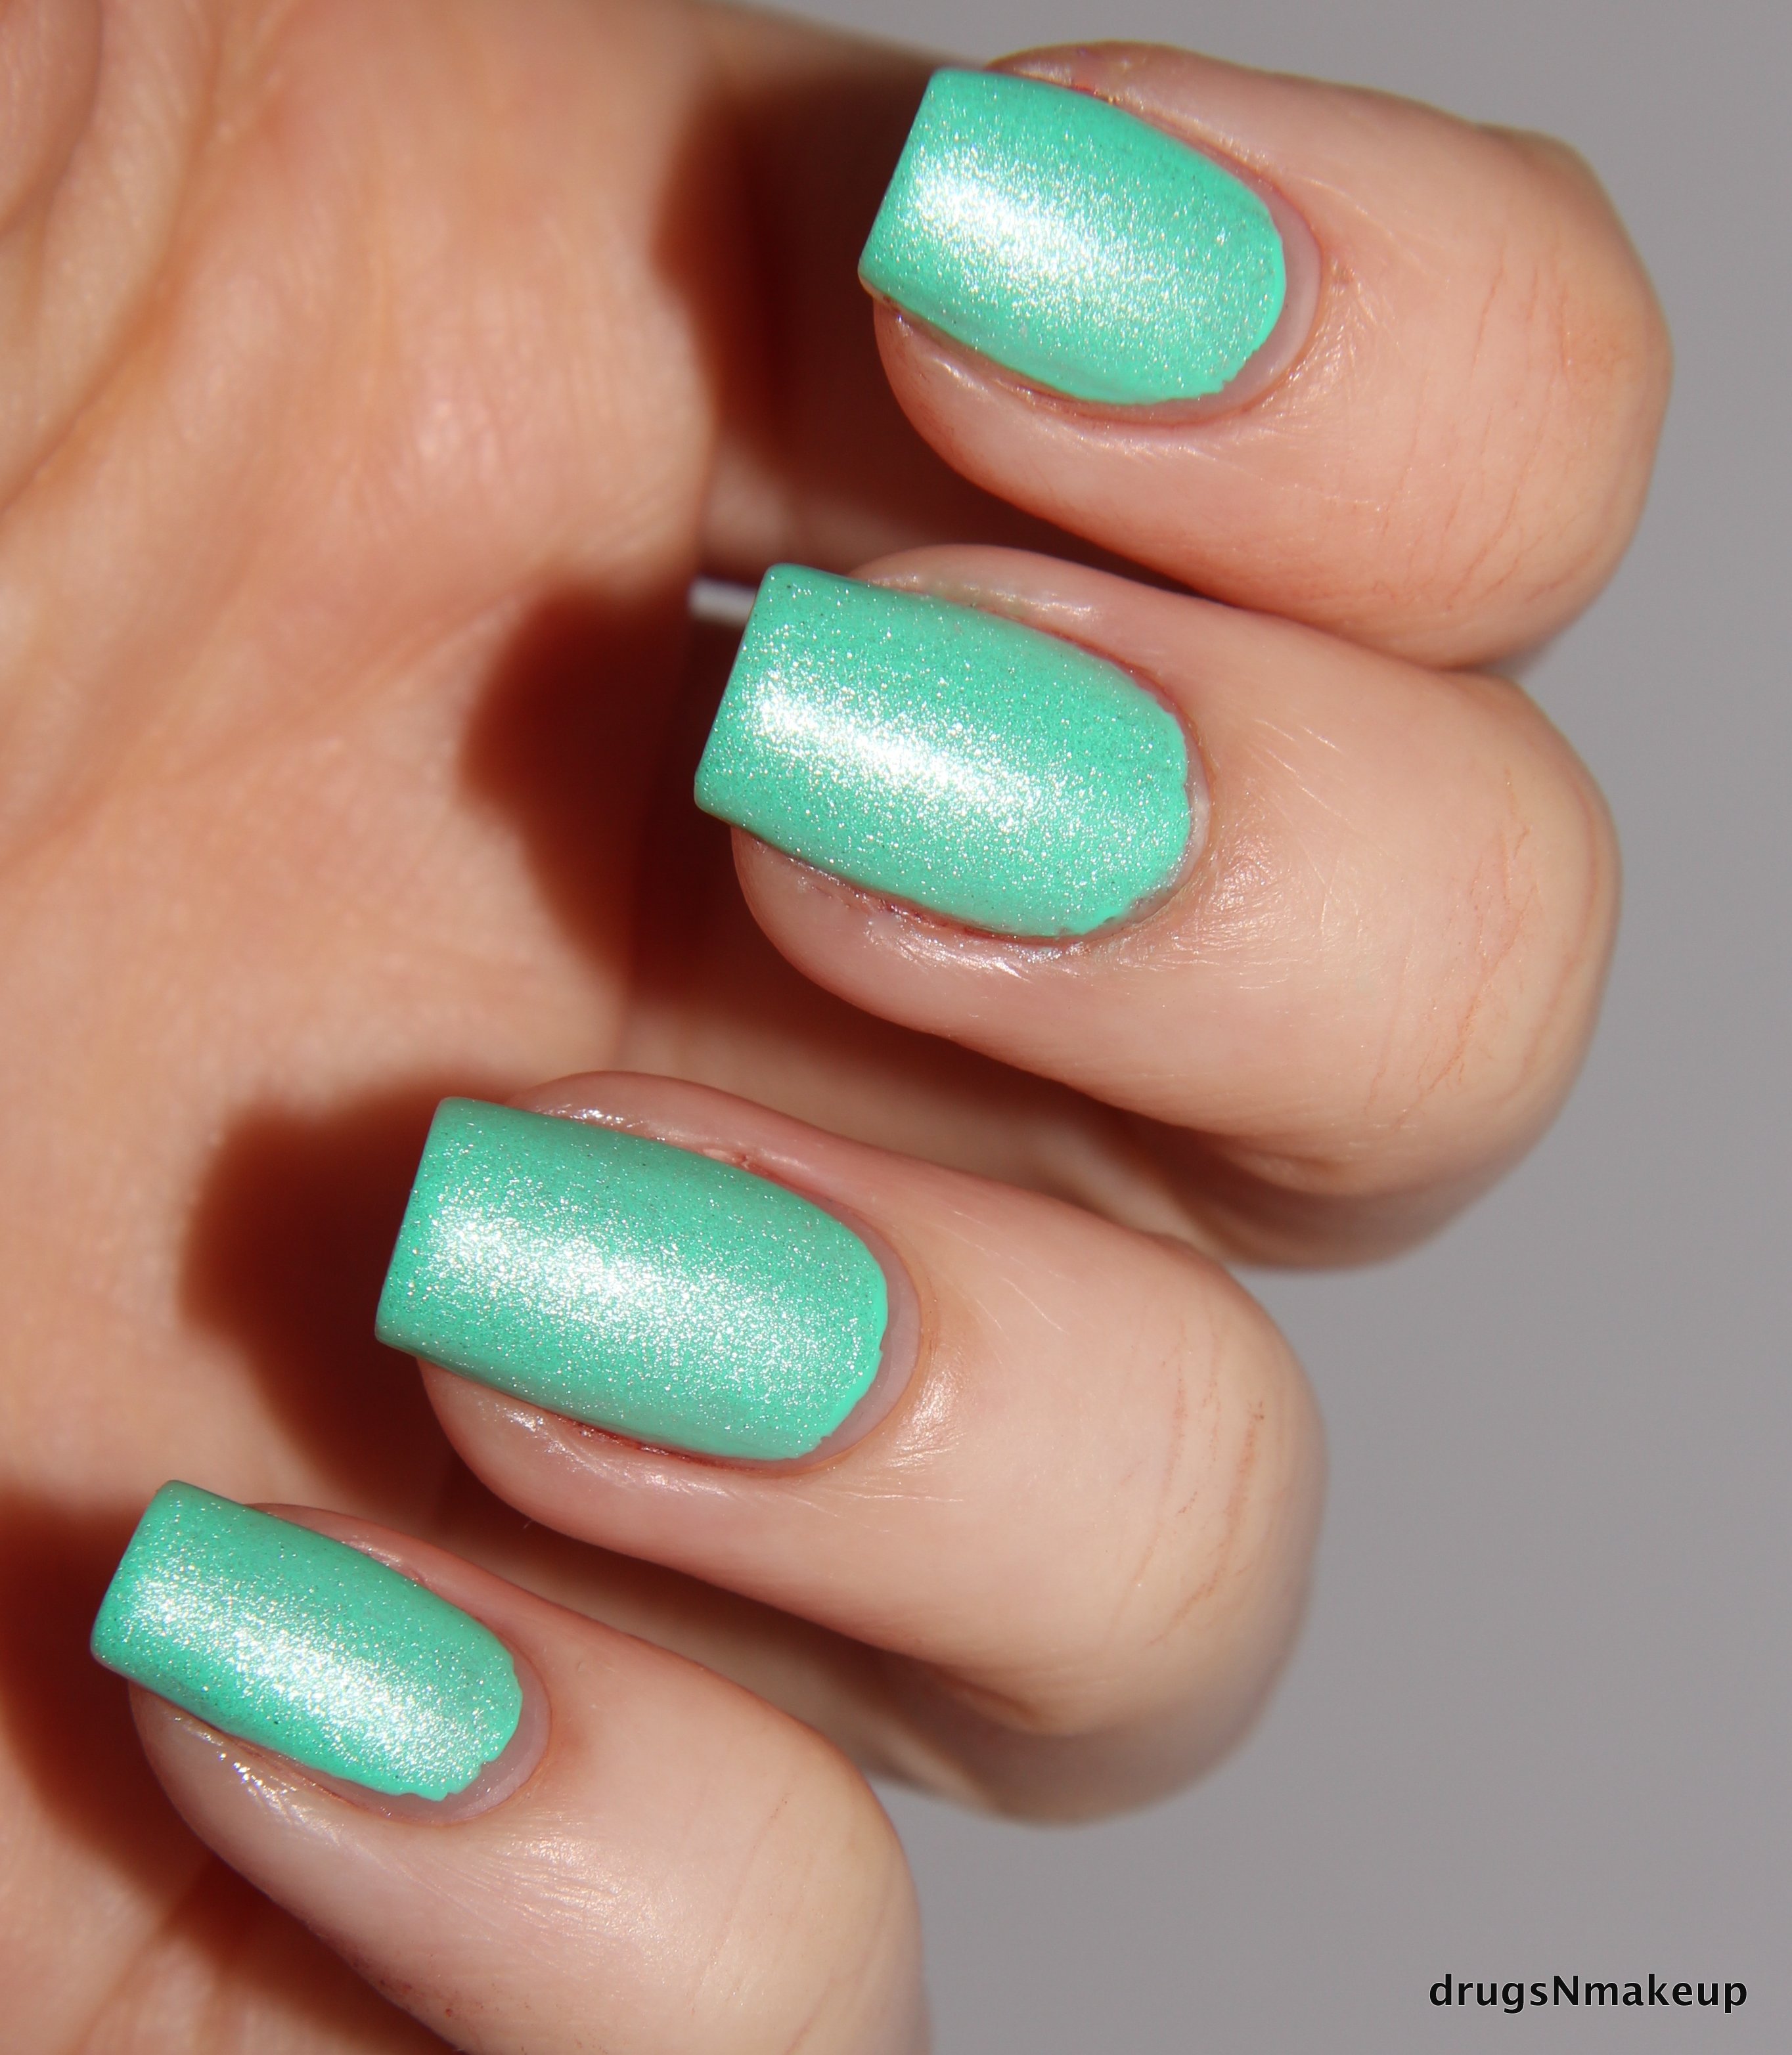
Raucous is a brown matte with a very subtle shimmer and blue green flash

Surprisingly, I don’t own many, if any browns like this. I was thrilled when I saw this because it’s so different from shades I already own.

ImageImageImageImage

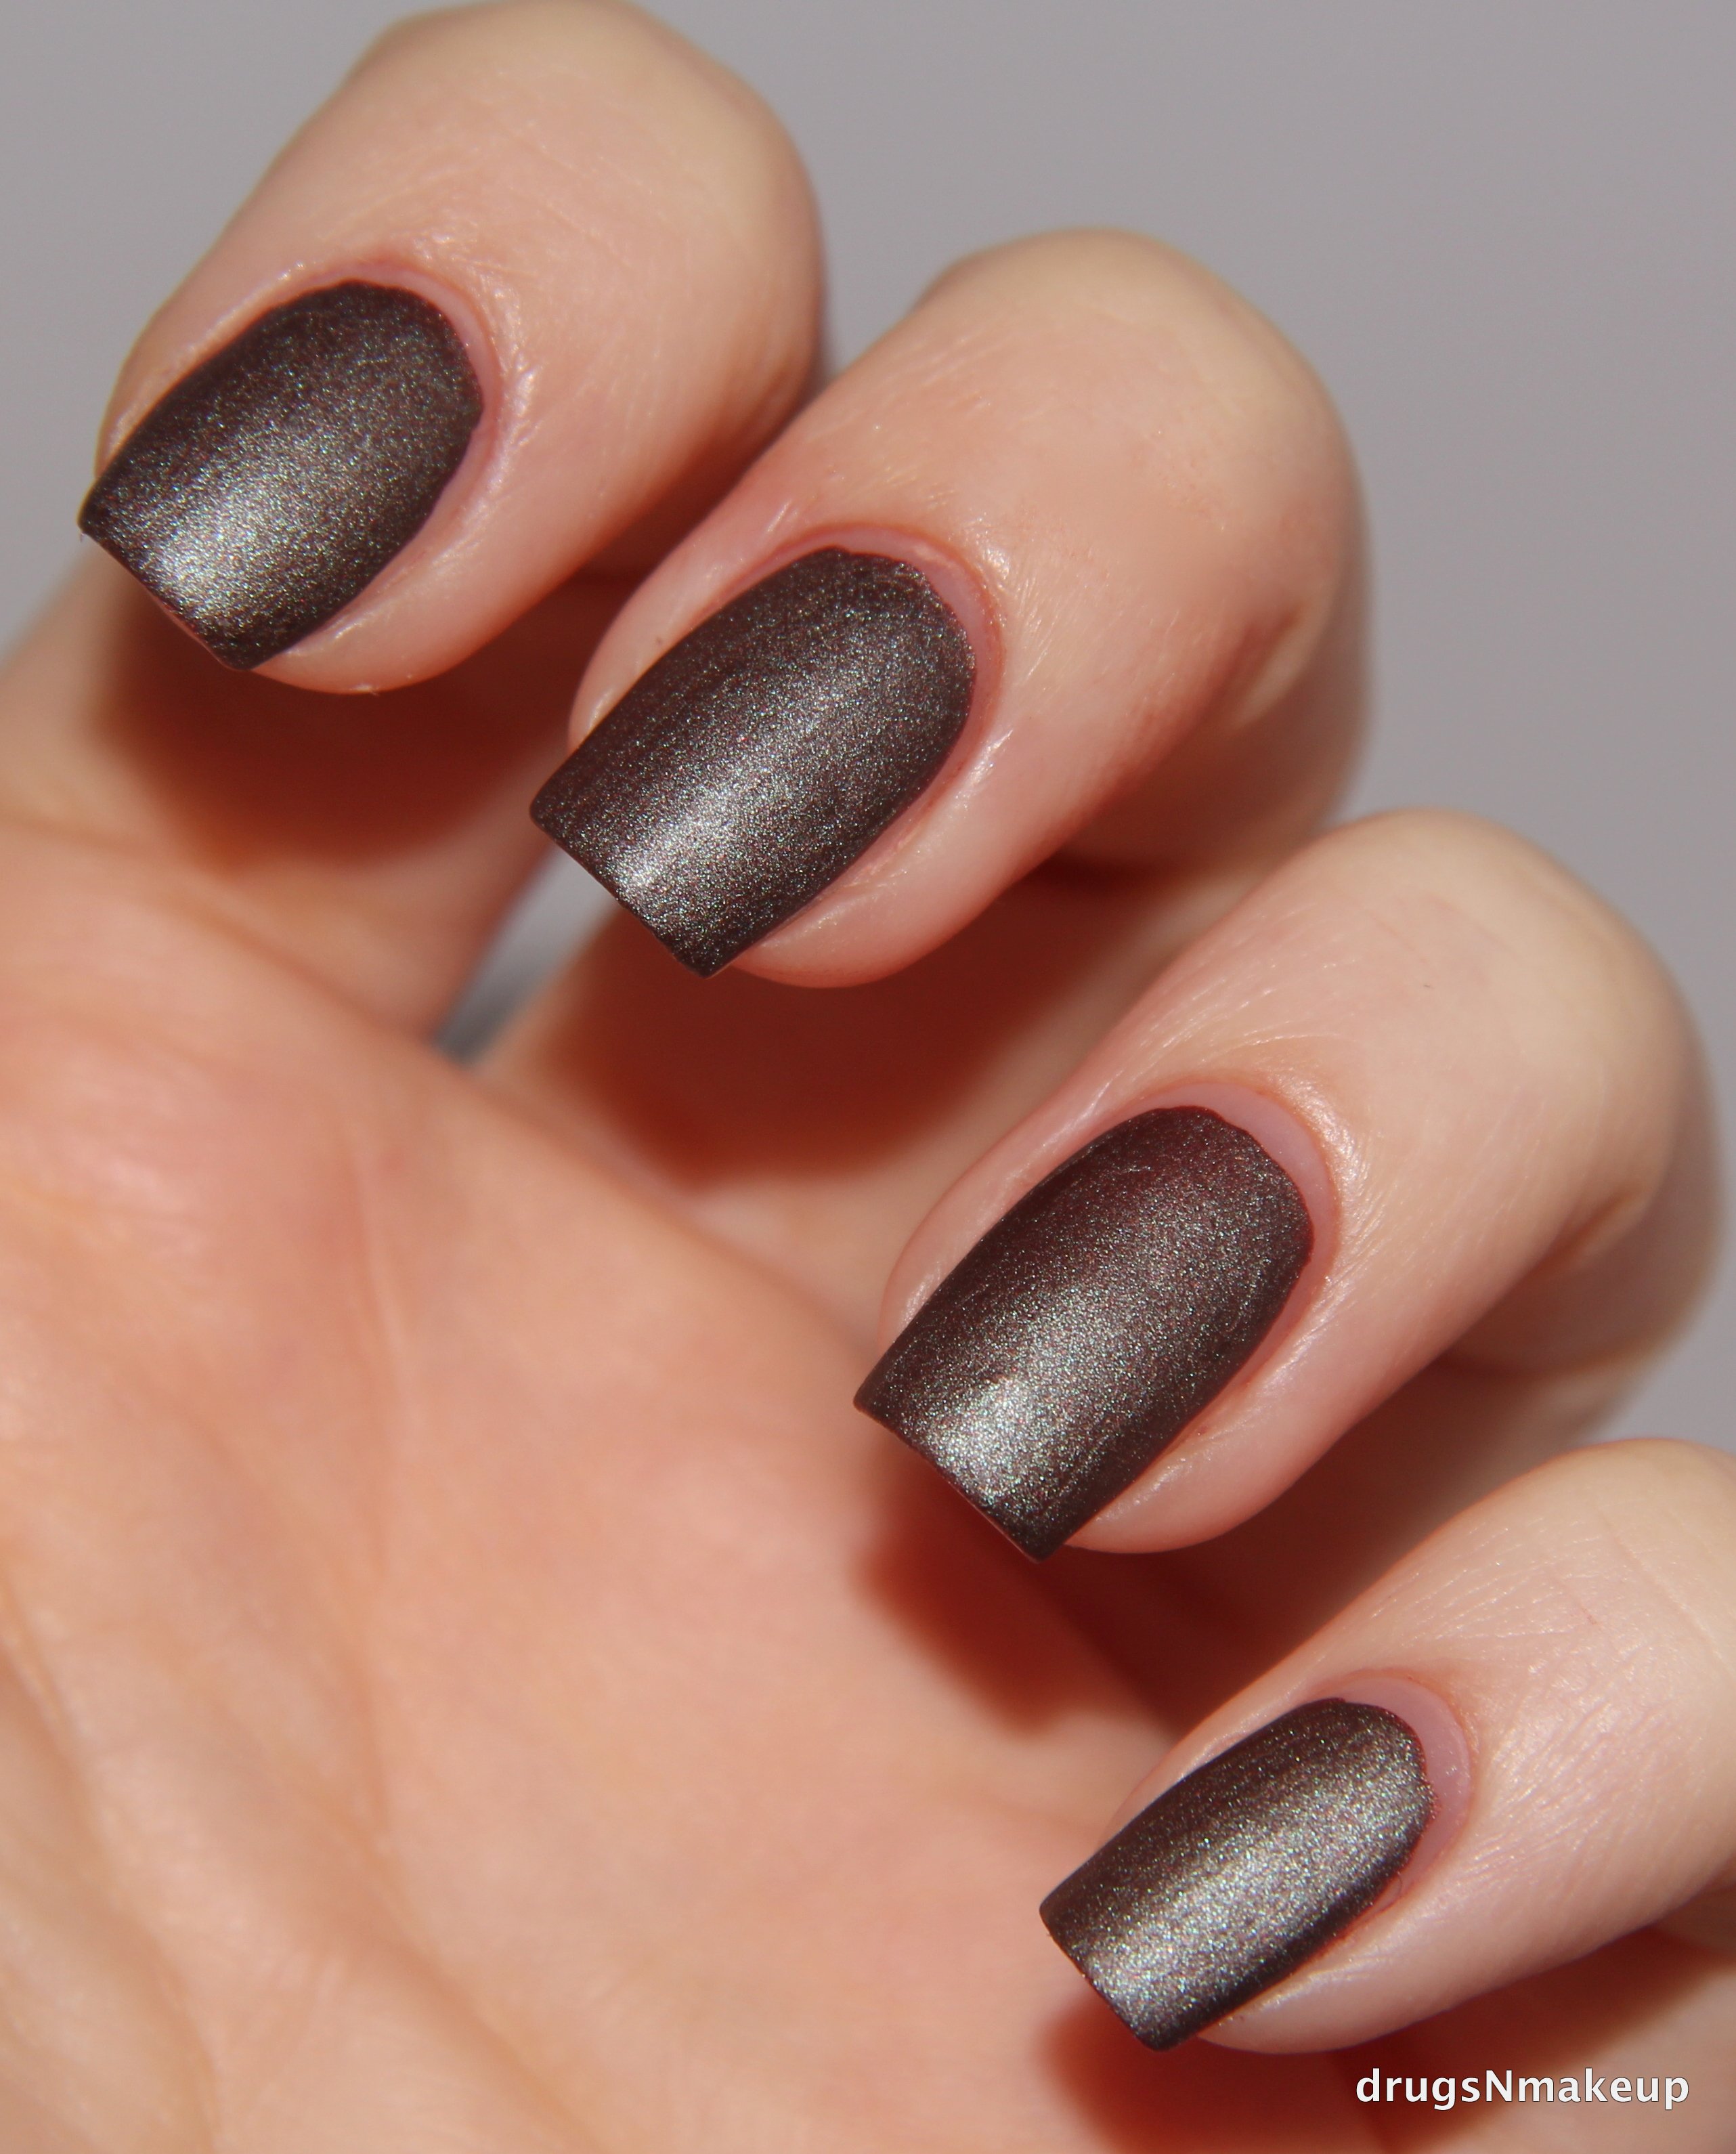
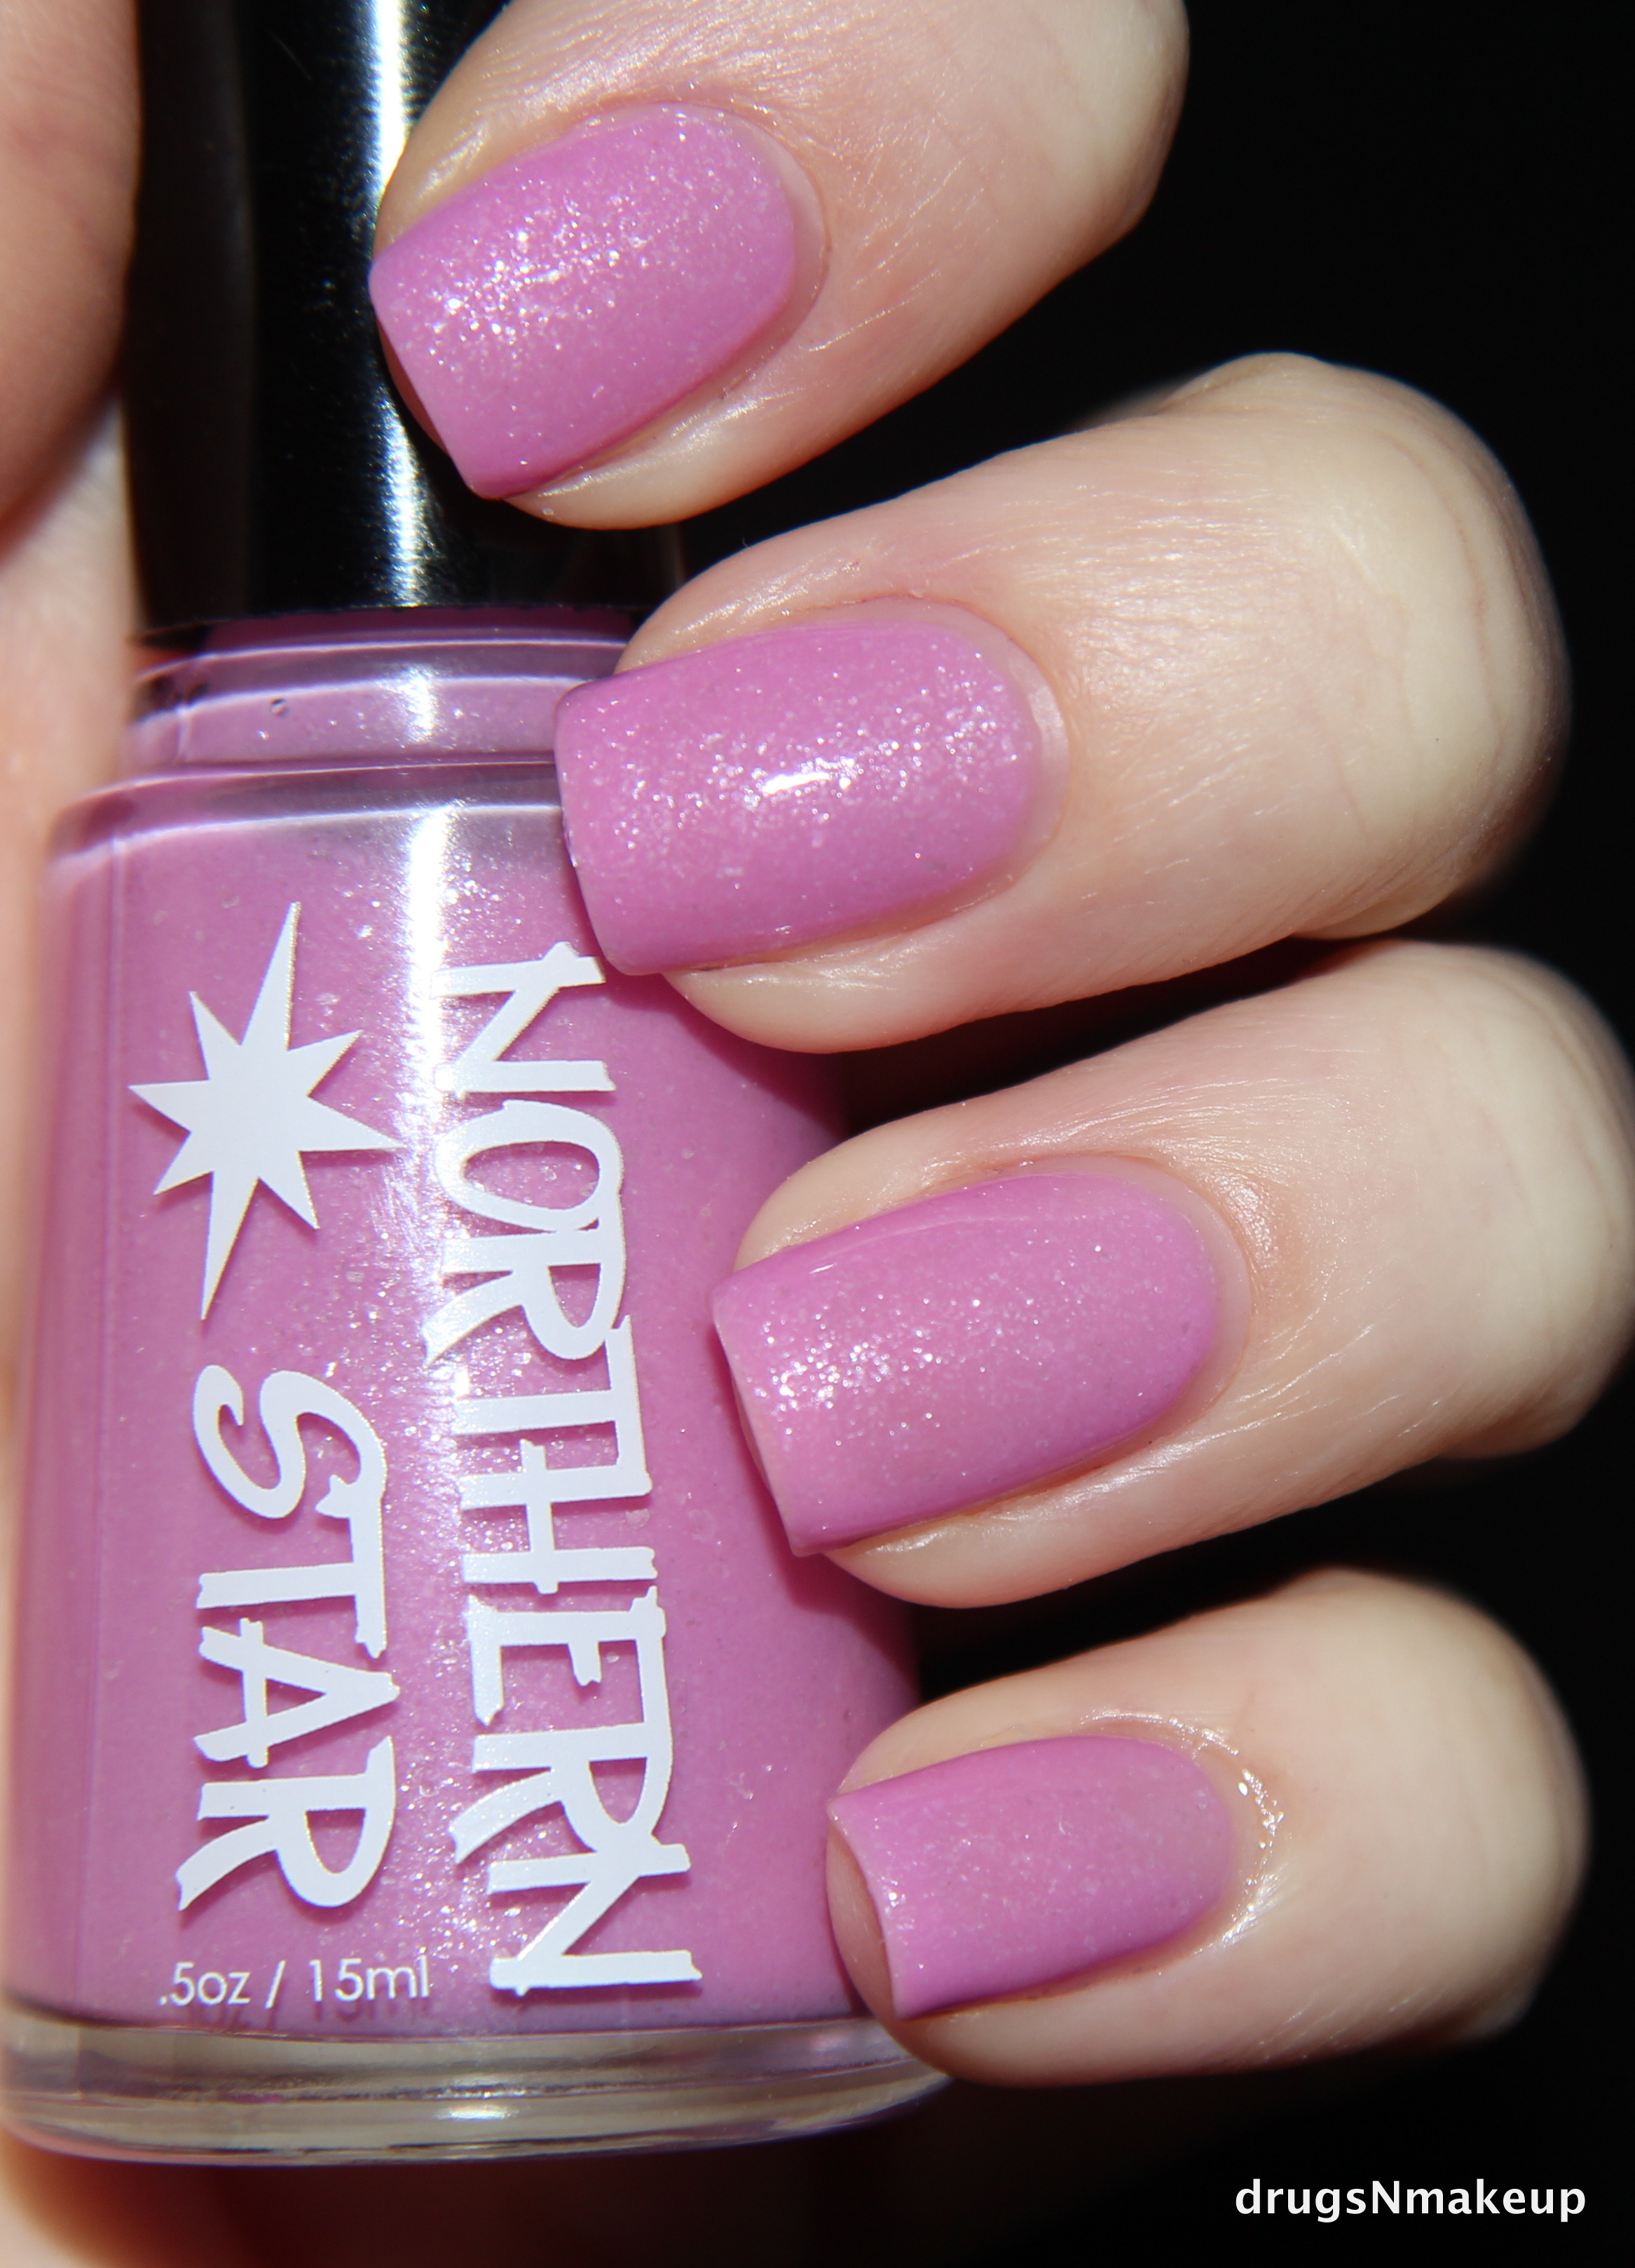
Do you see what I mean about it being matte AND shimmery?? It’s soooo unique and I was instantly in love. These swatches show 2 coats of Raucous over a base coat with no top coat. The formula is amazing!! It’s a thicker formula so I recommend using thin coats, and it dries quickly, so make sure each coat is dry before applying the next coat to avoid smudges and lumps.  I did notice that any unevenness evened right out as the polish dried. Applying this reminded me of delicious melted chocolate. It glided so perfectly over my nail. The brush is a square brush and I found it to help make application flawless!

Image

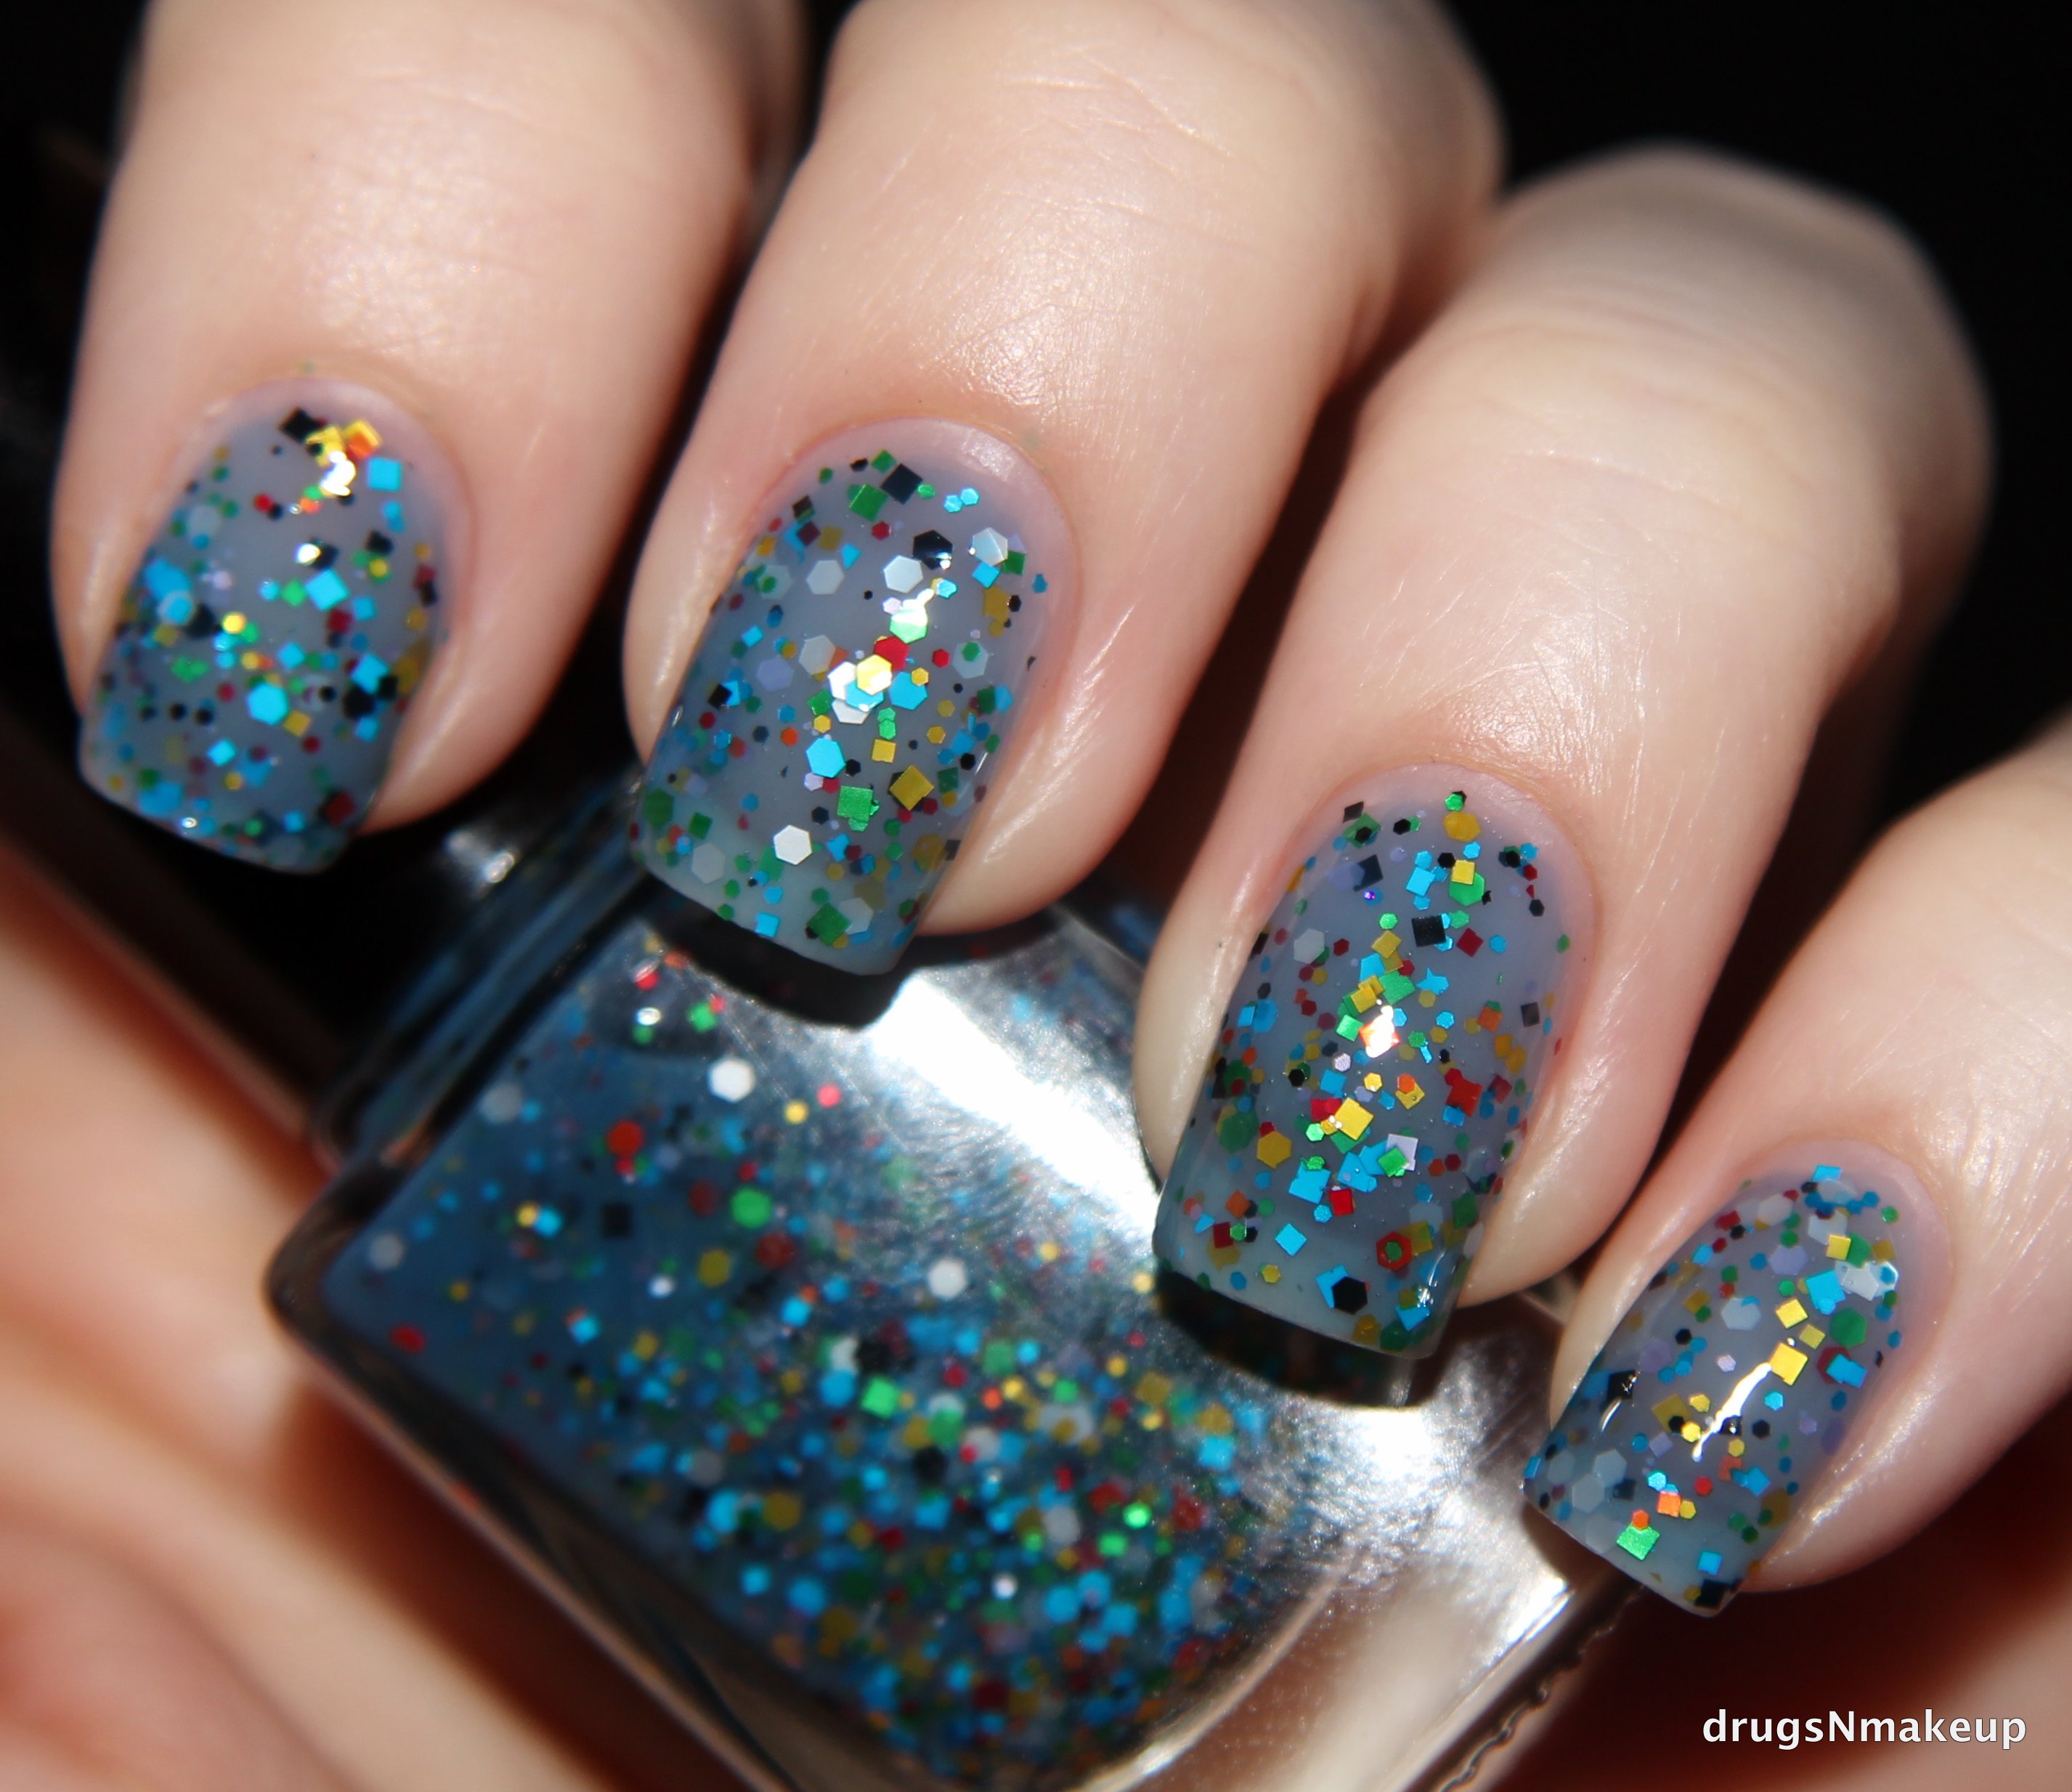
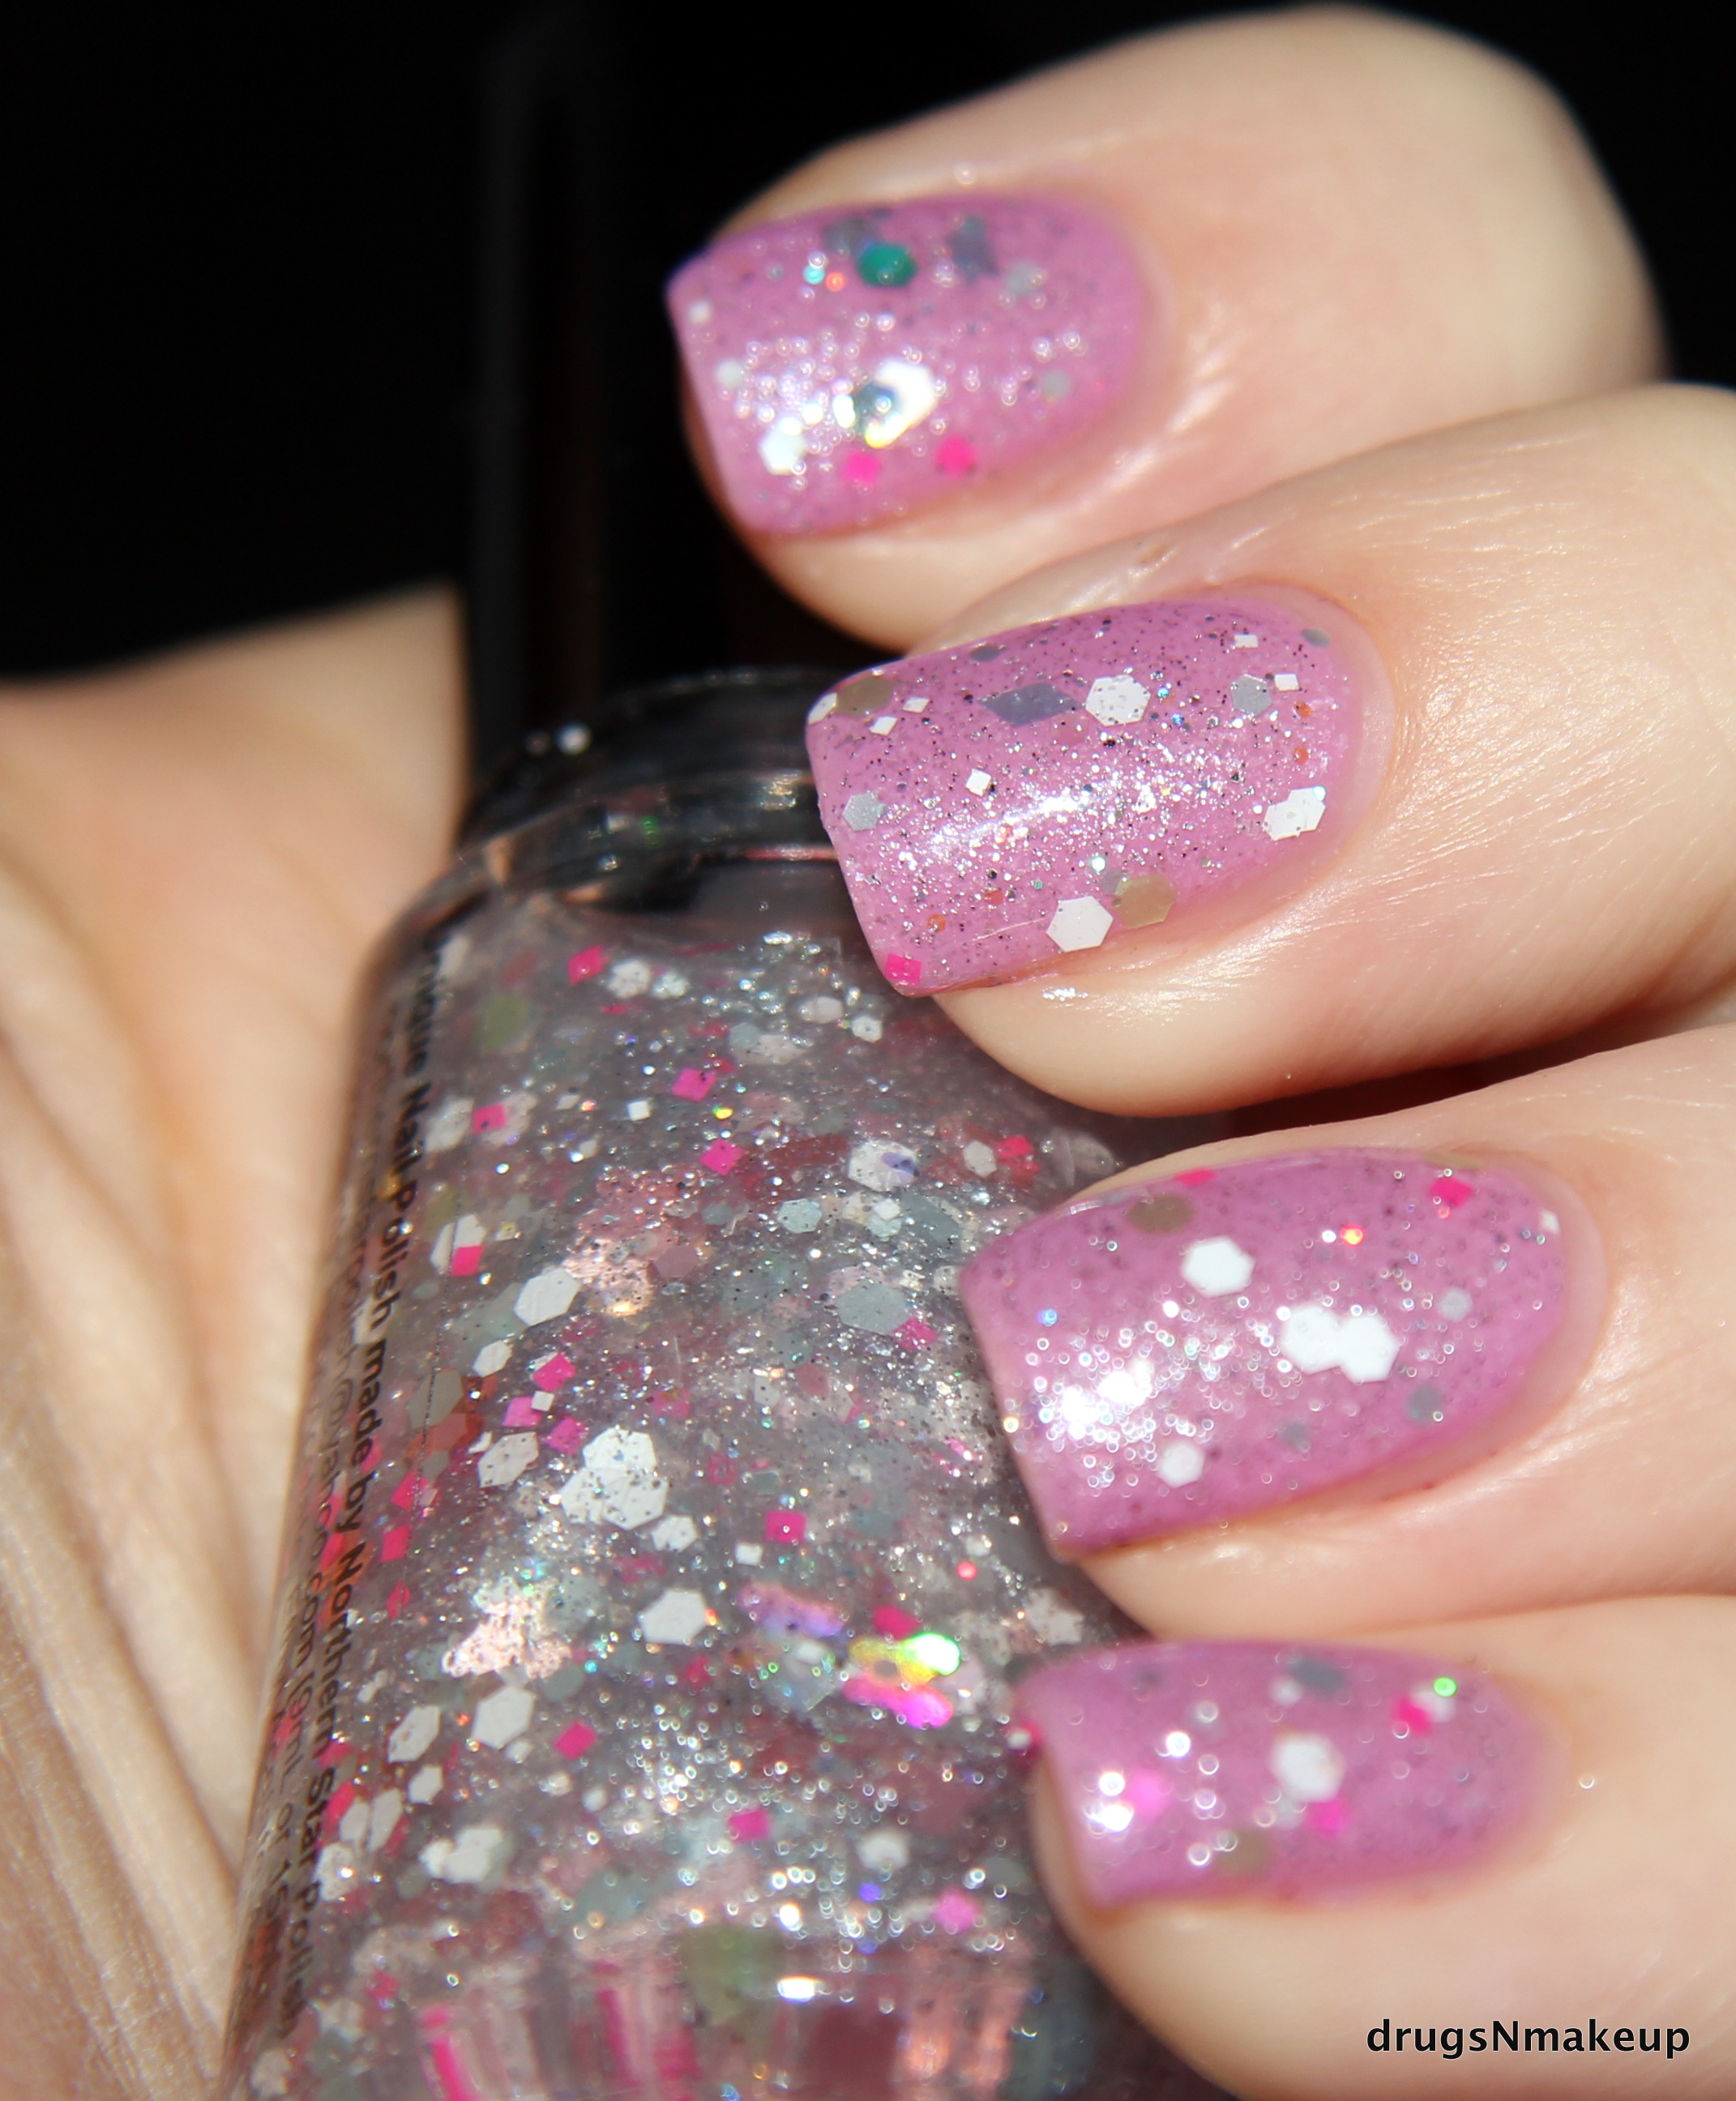
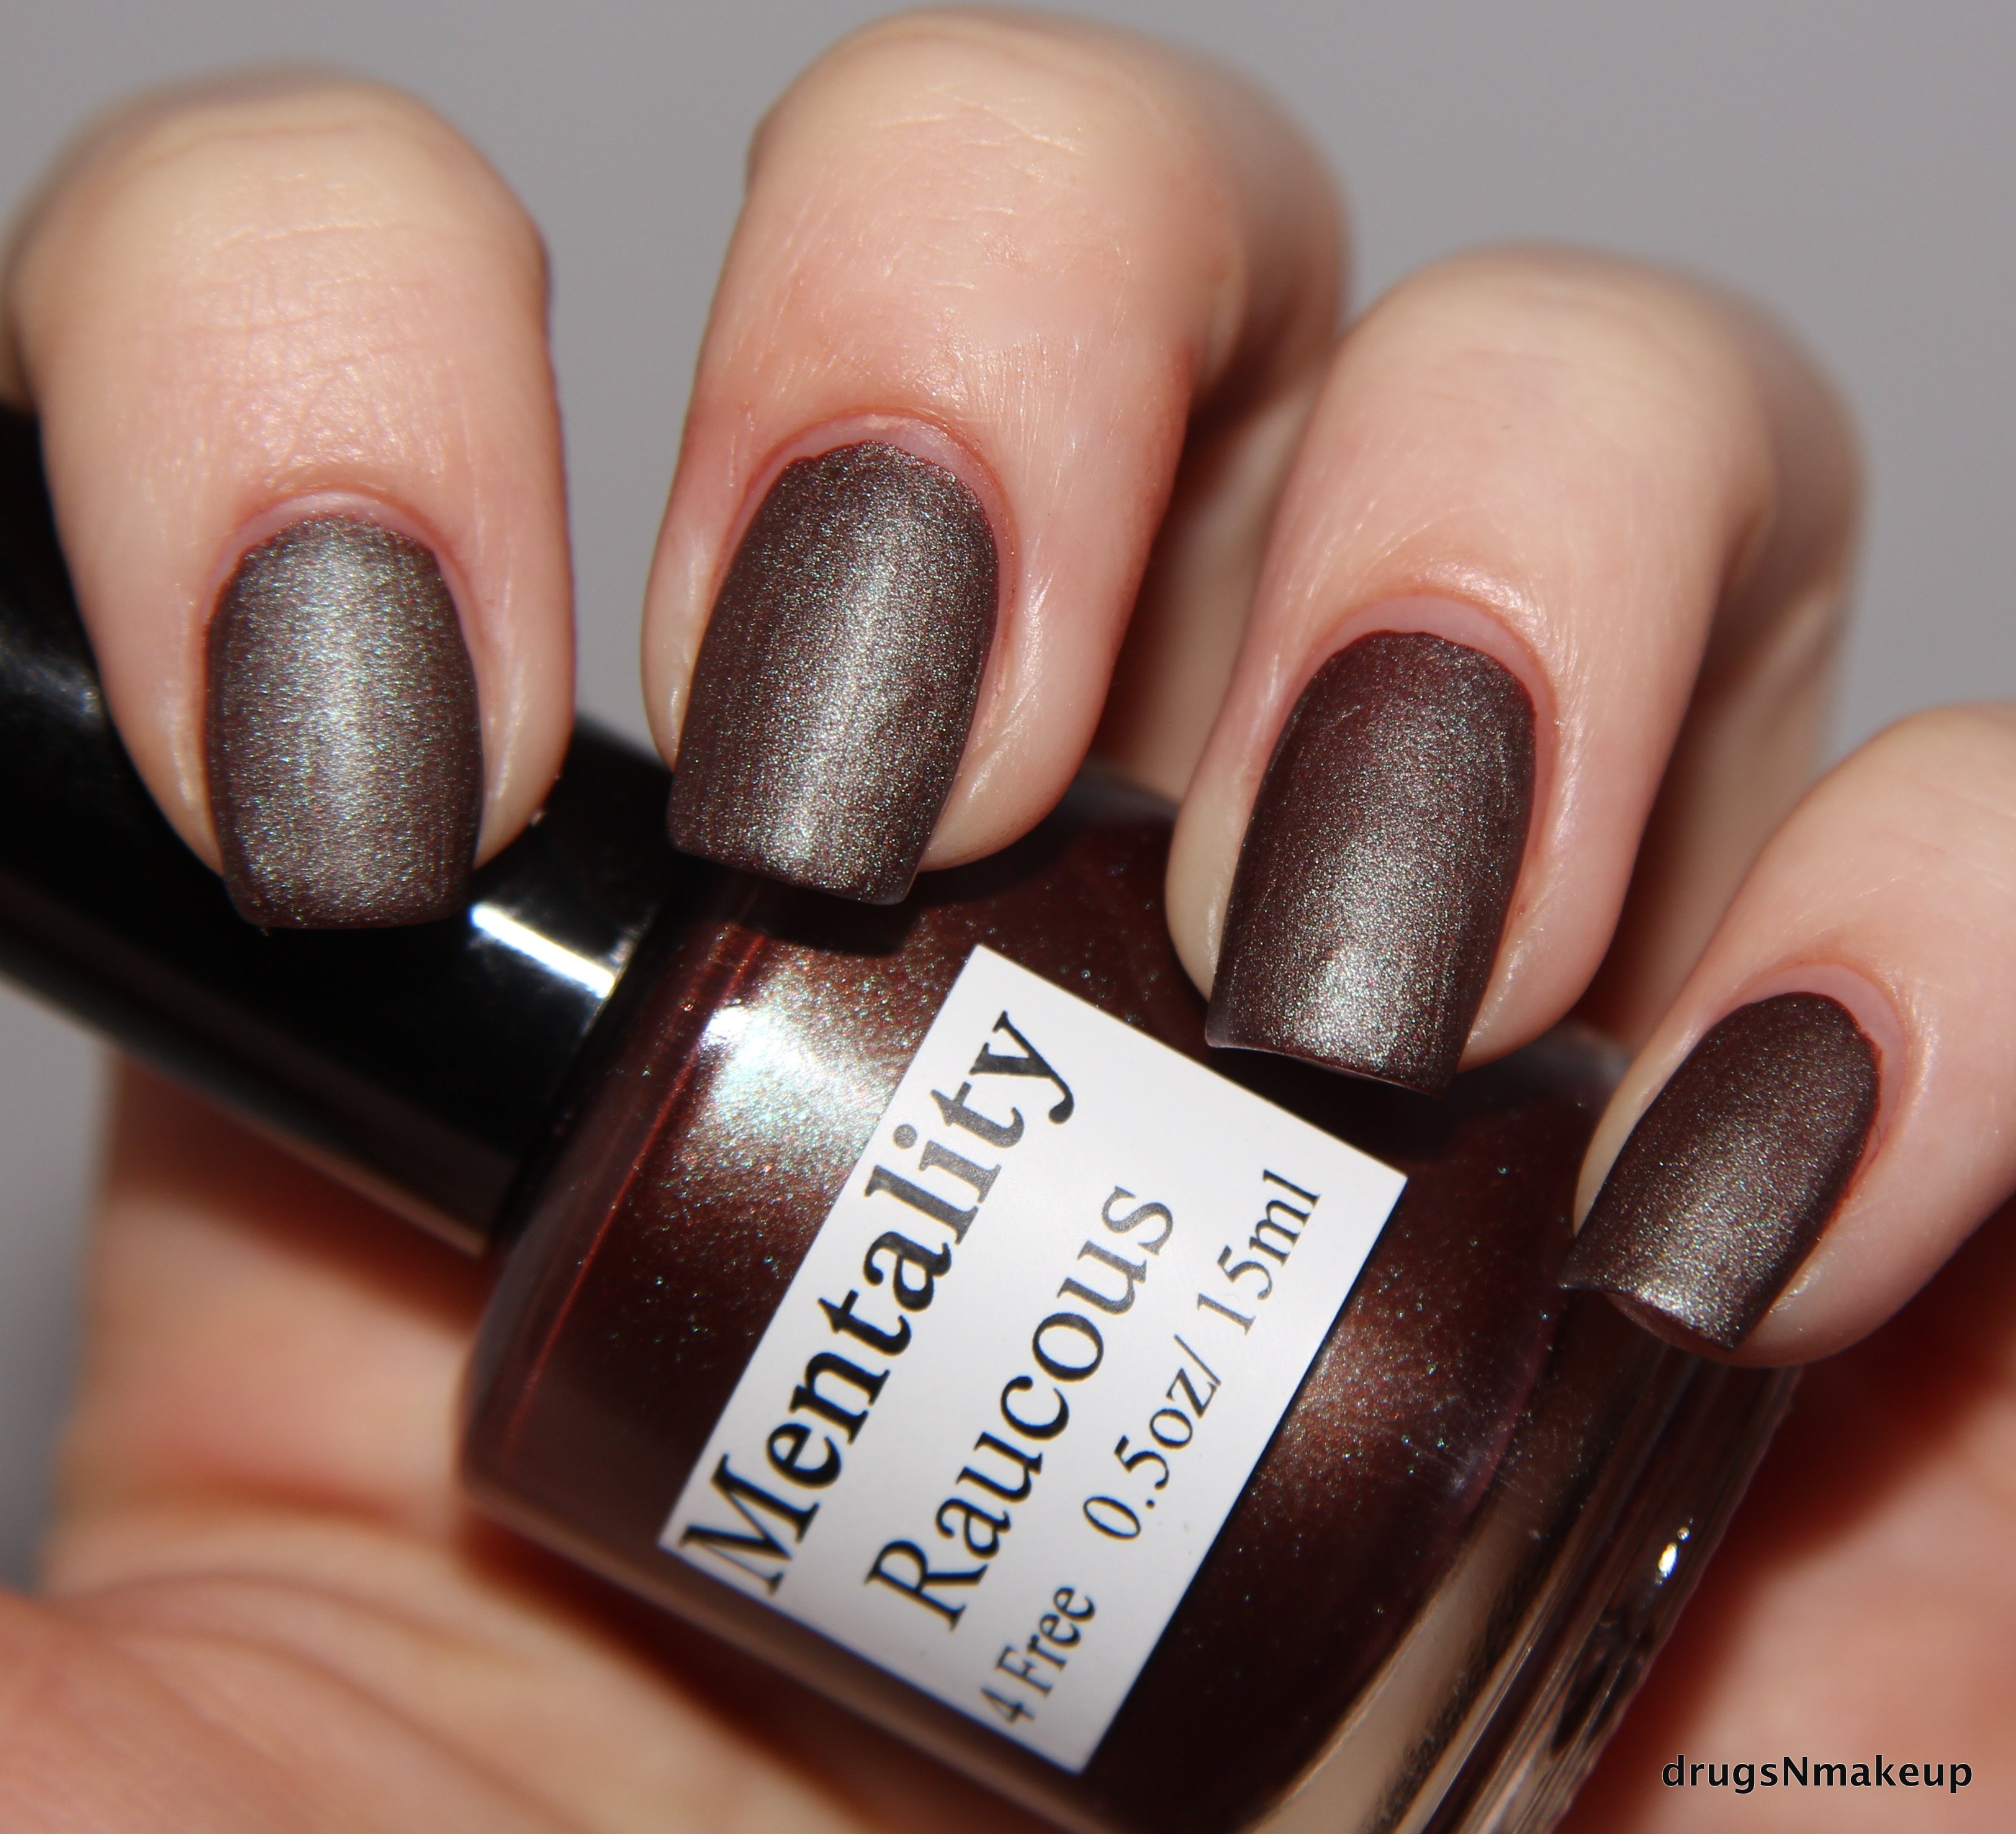
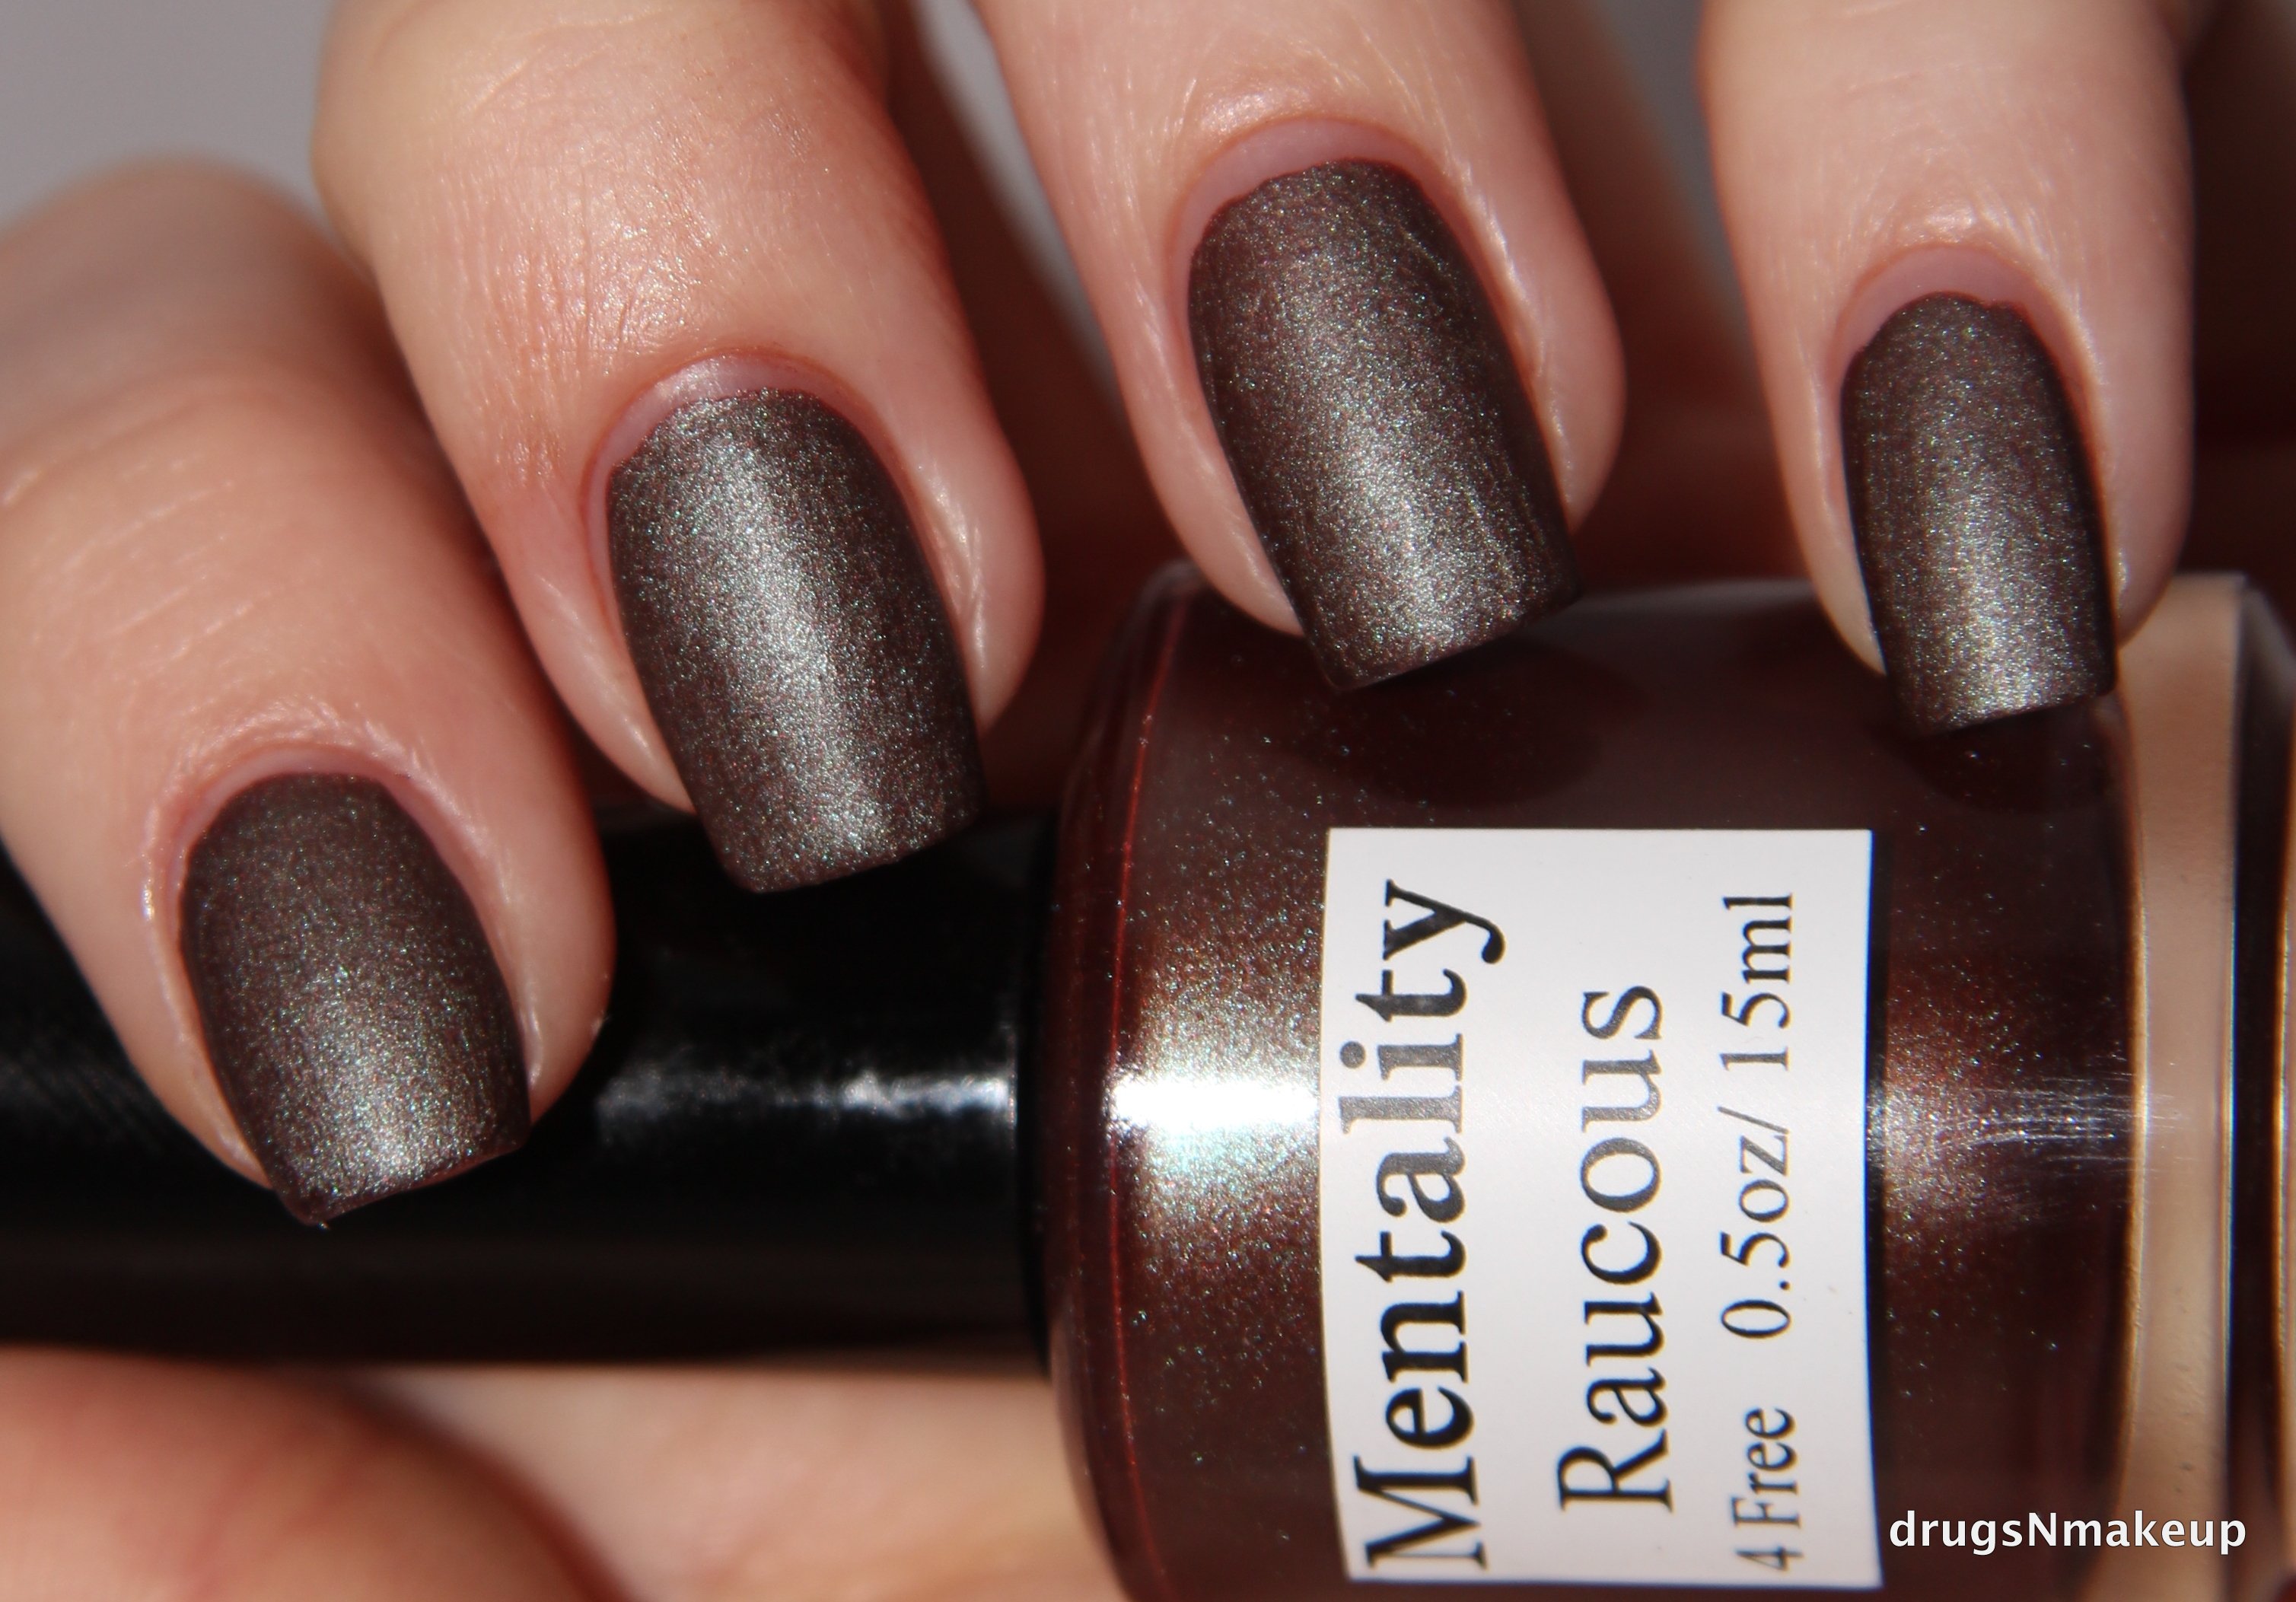
Raucous with top coat

I added a topcoat in the above photo just to see what would happen. It’s also soooo pretty! It seemed to emphasize the shimmery-ness of the polish.

Image

Image

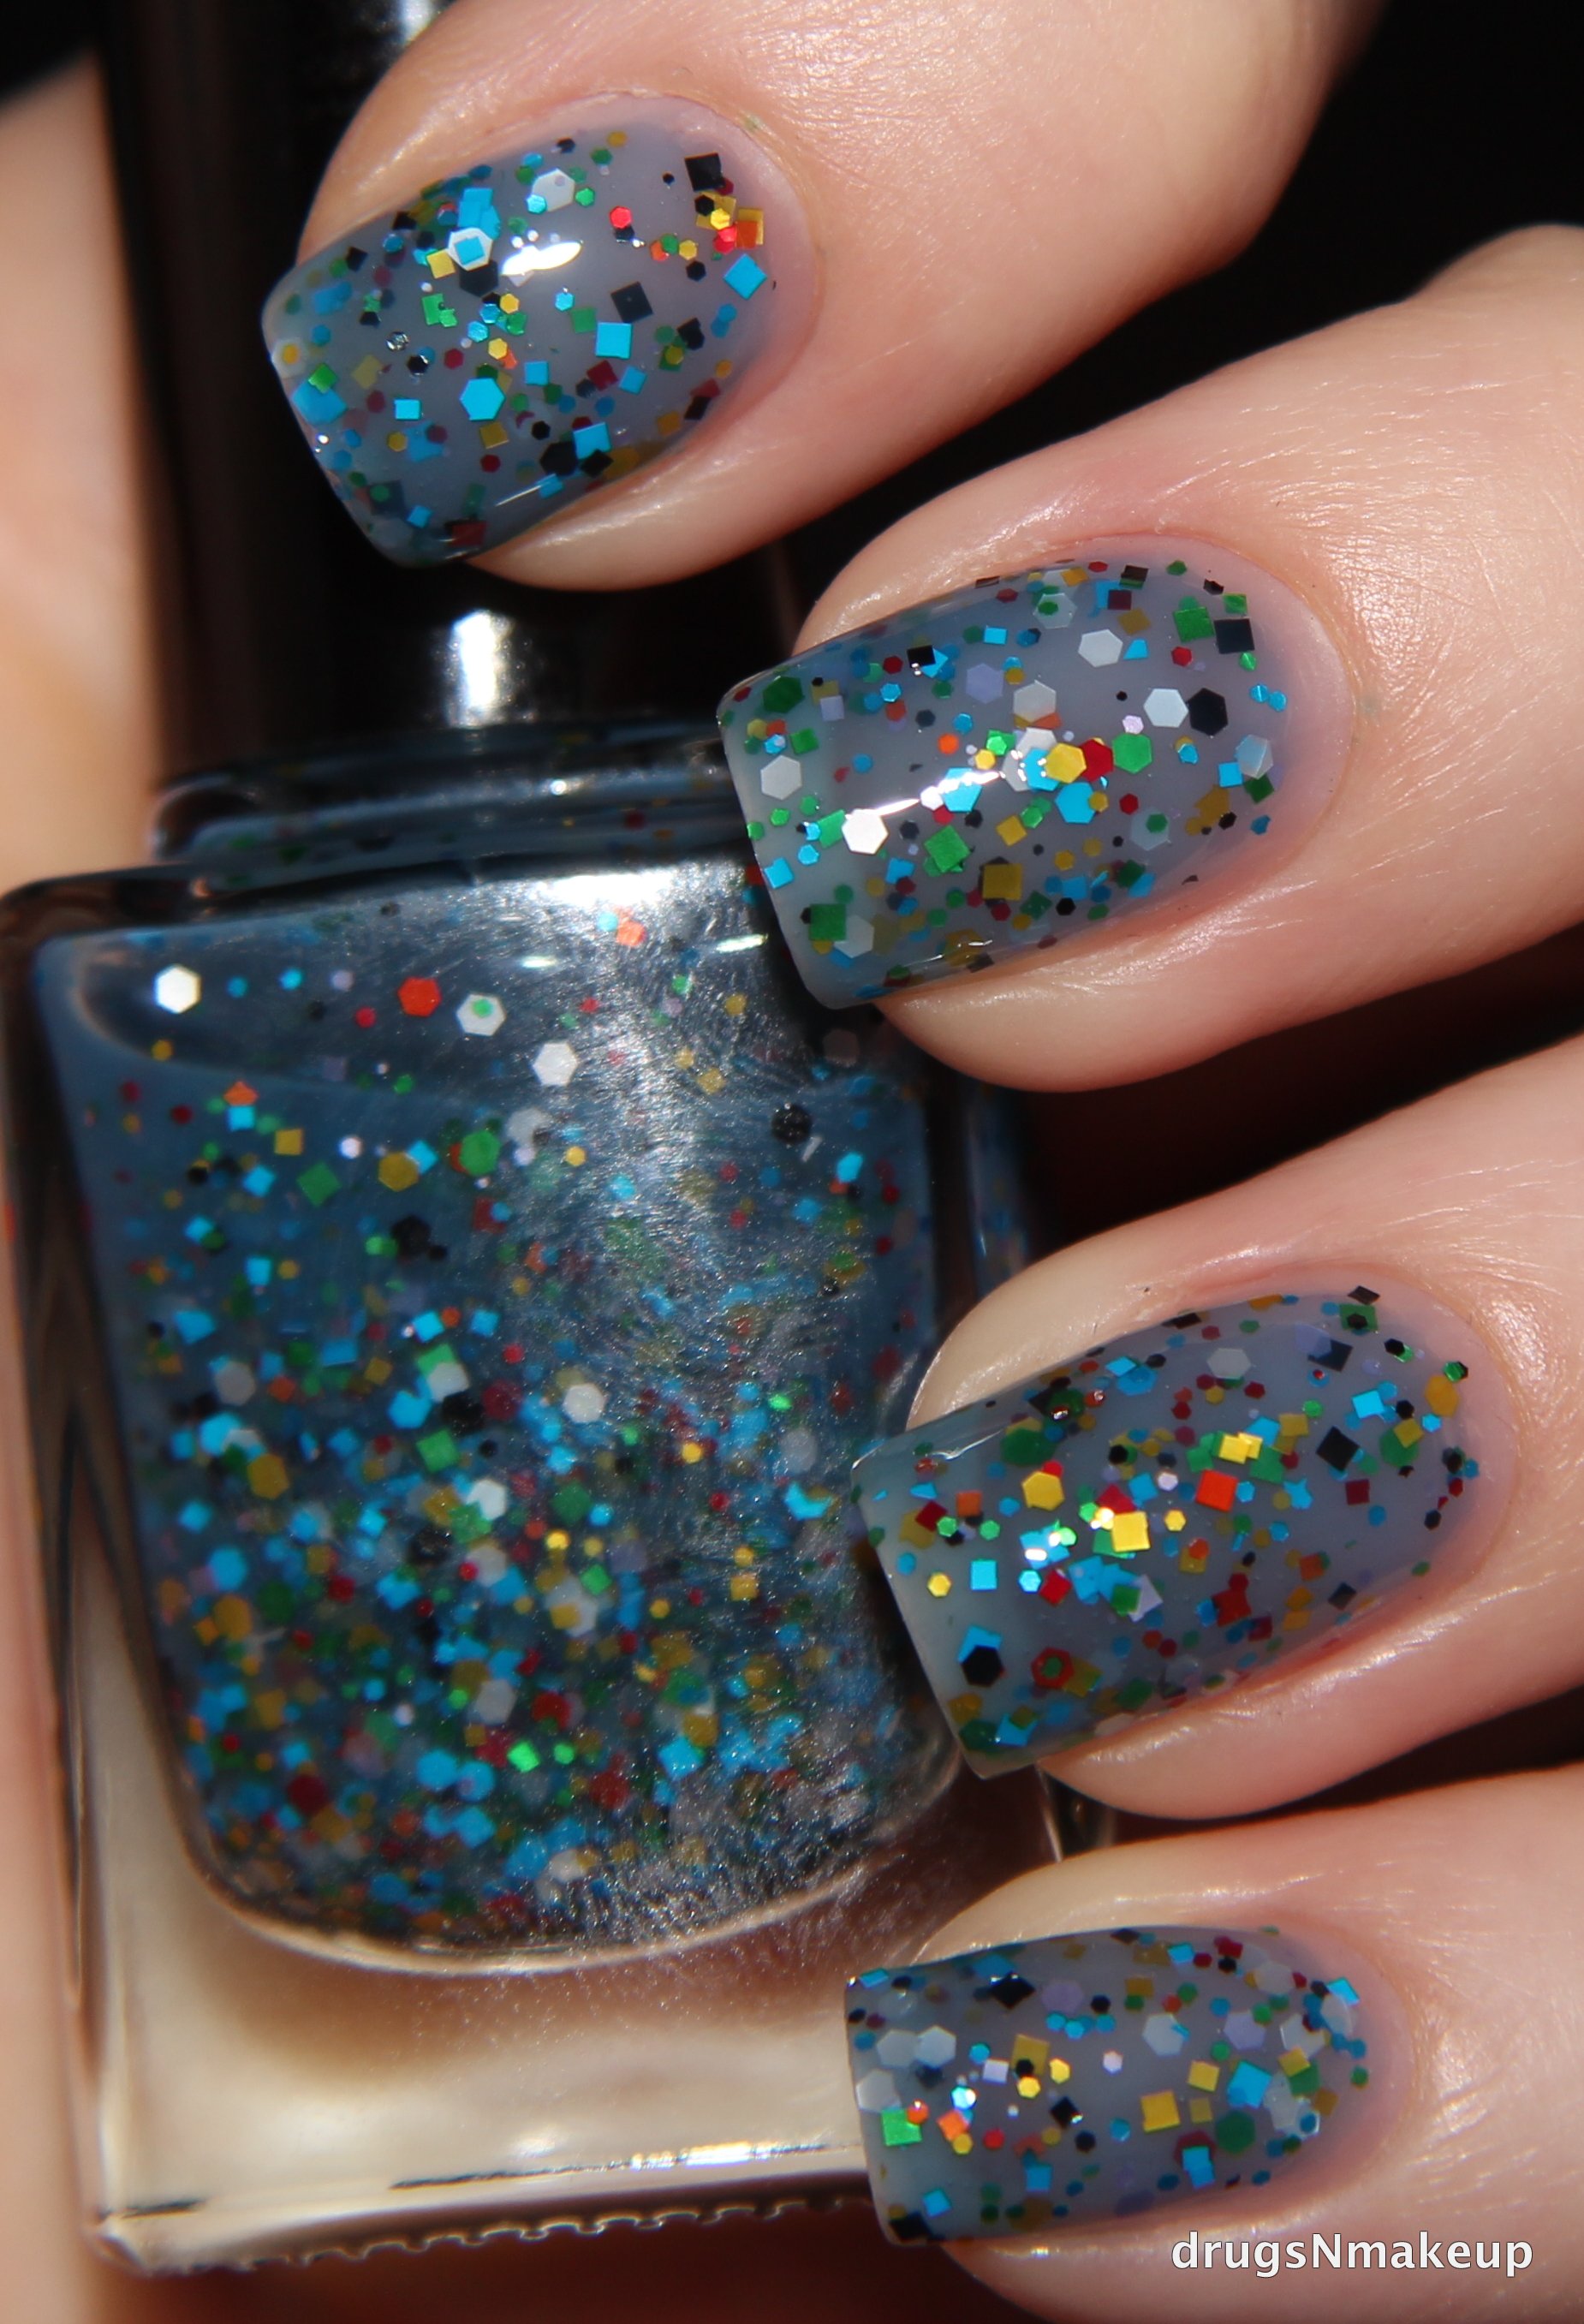
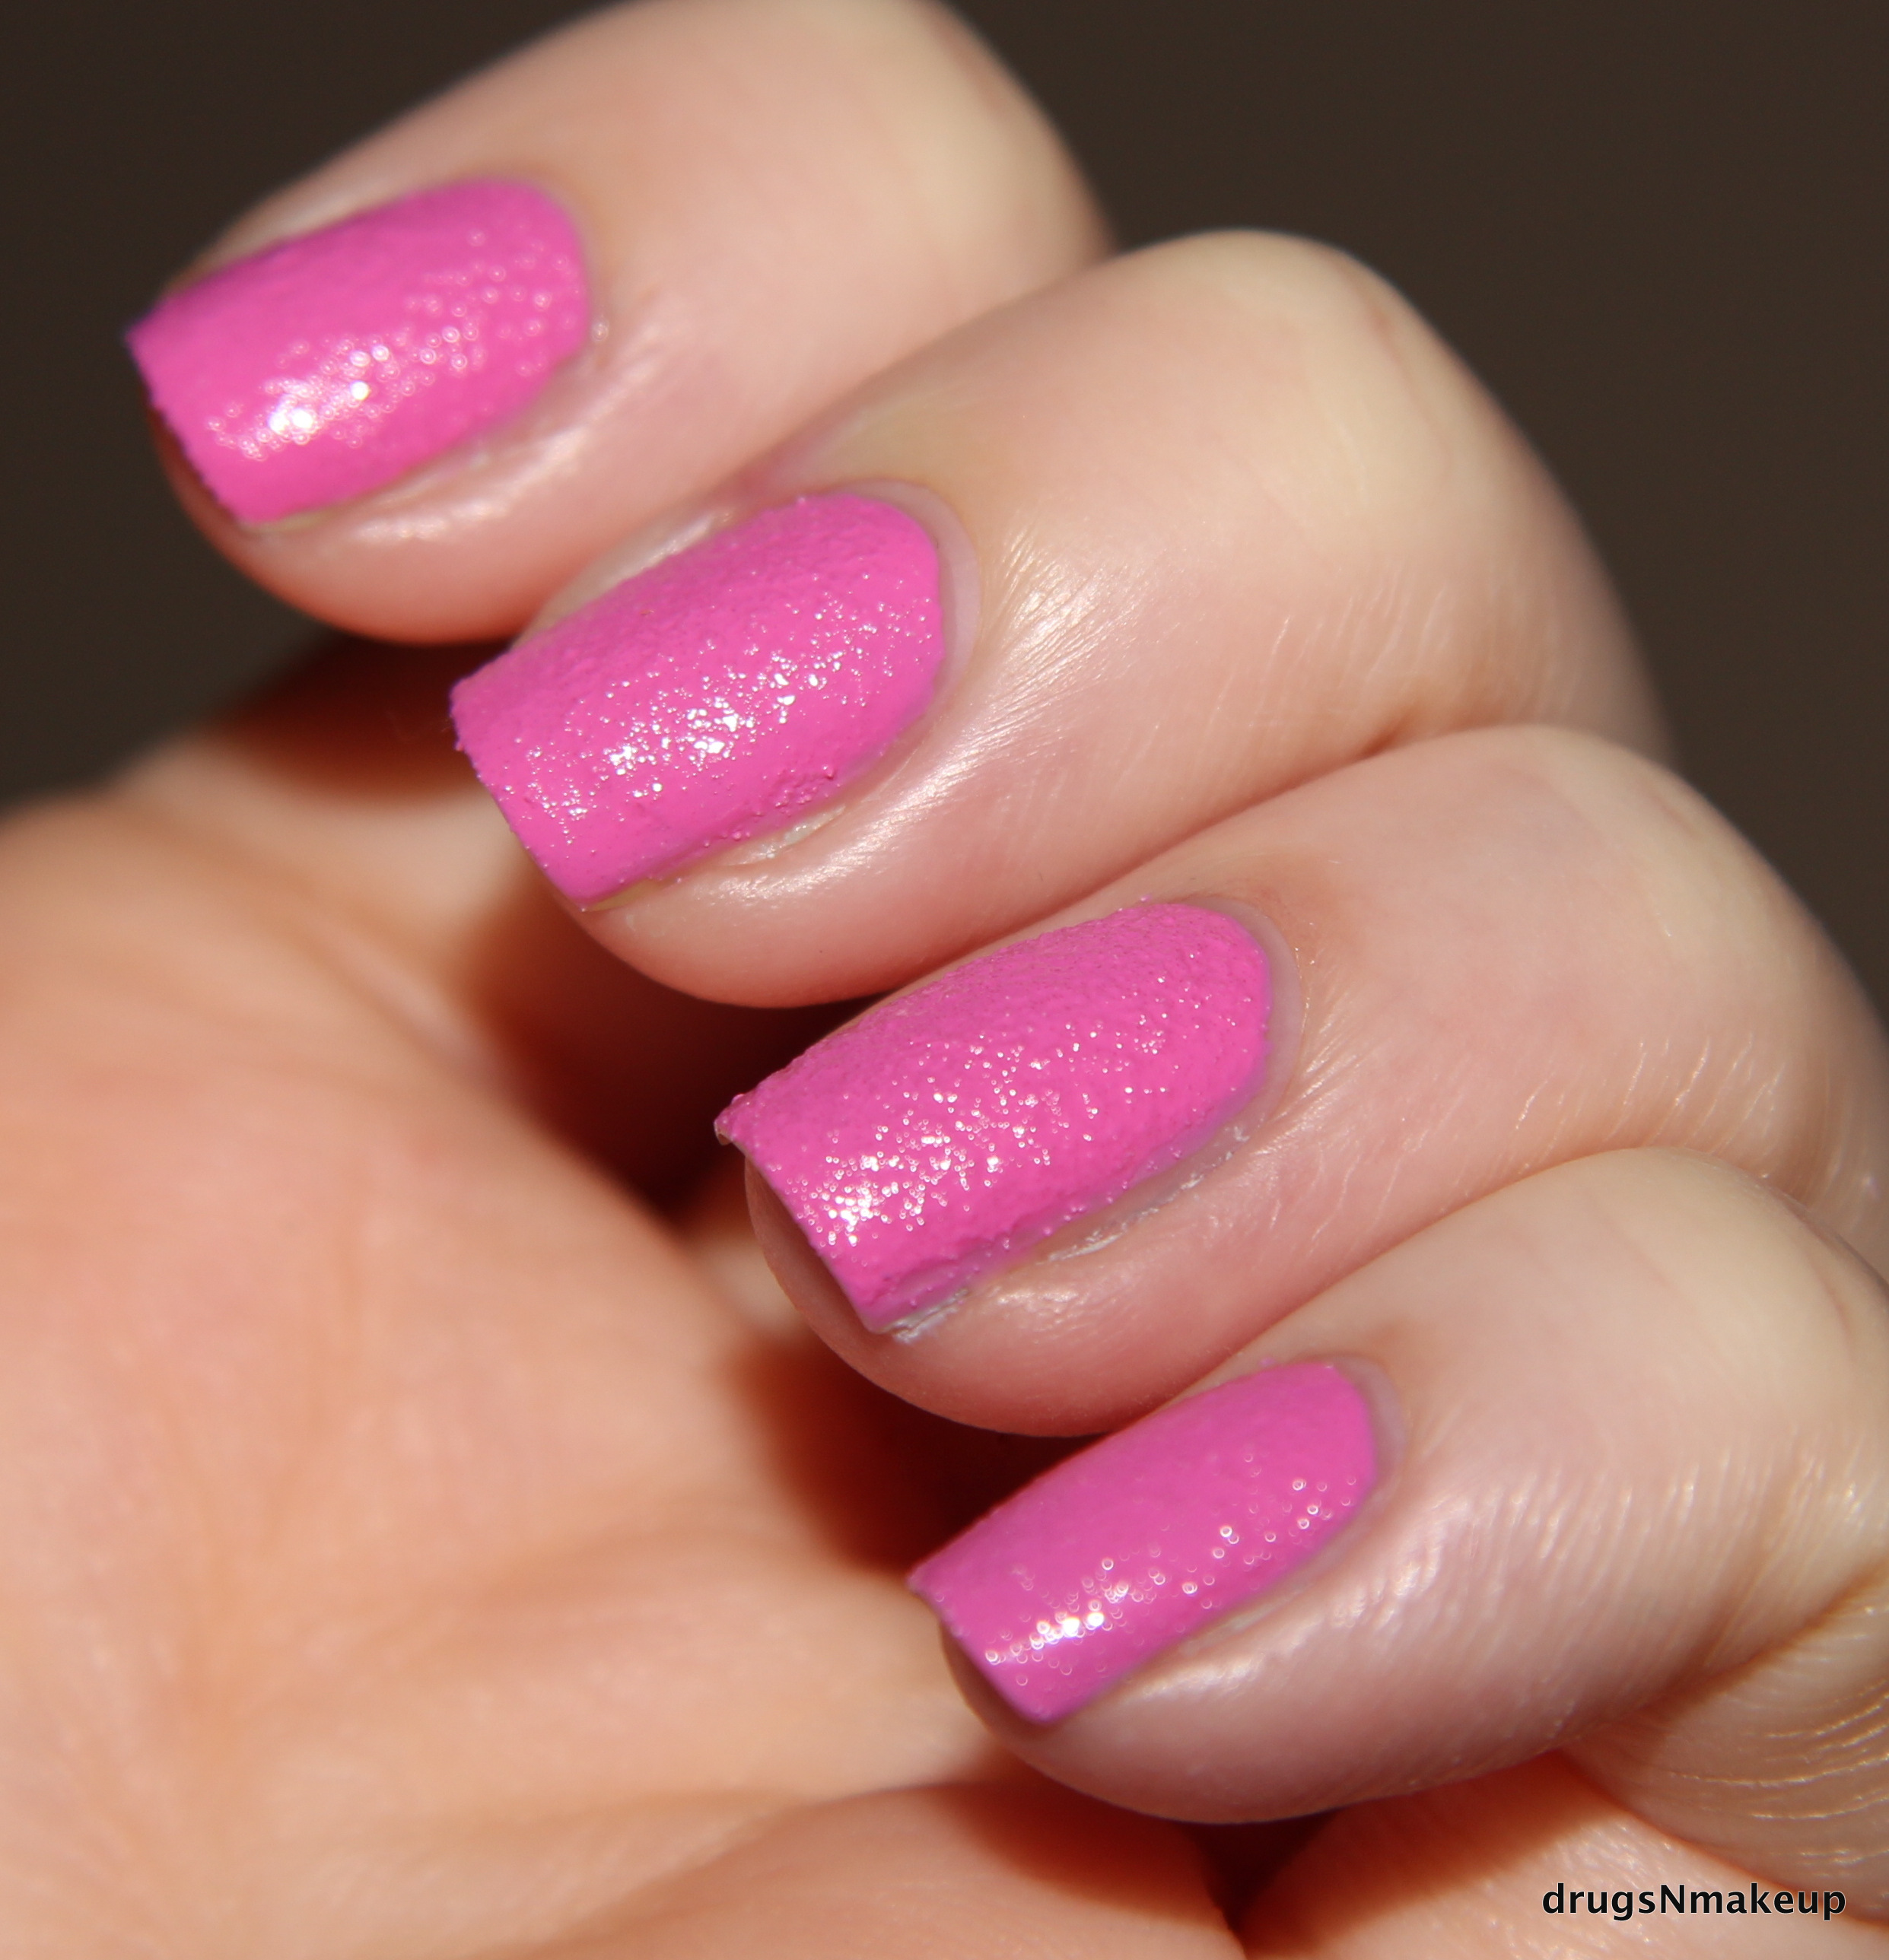
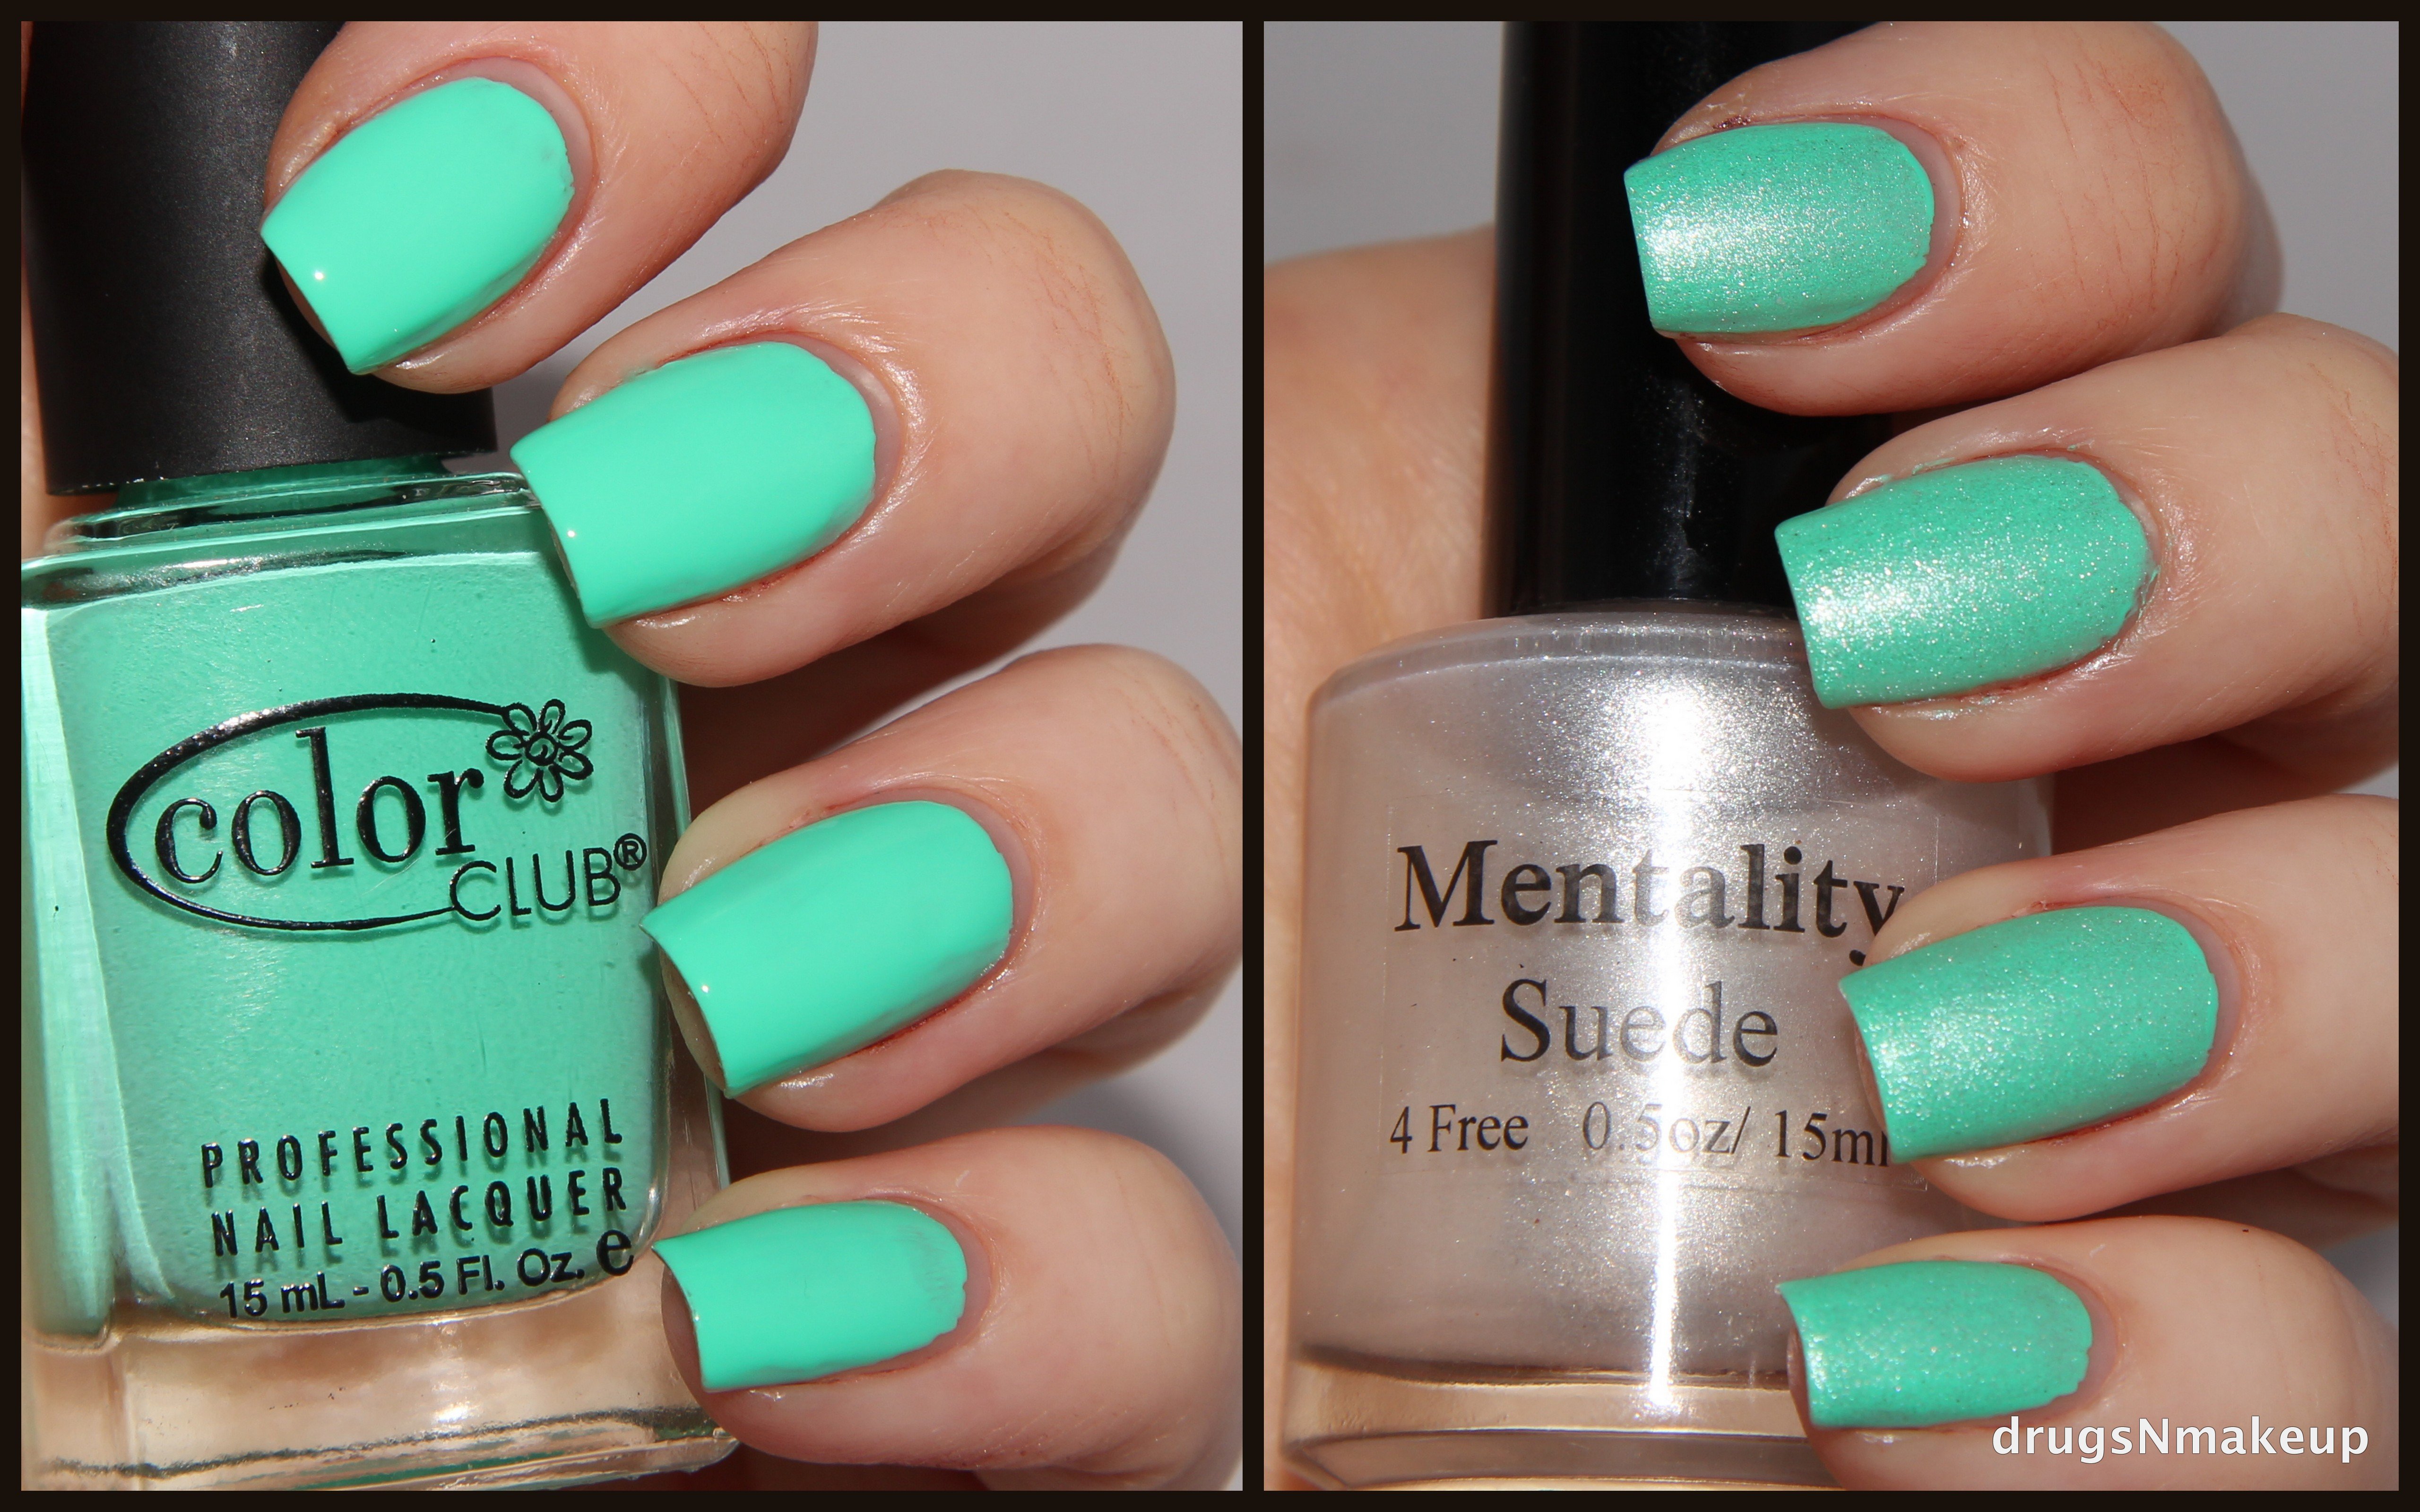
Suede is a shimmery top coat that dries to a matte finish to turn any polish into a suede finish nail polish.

ImageImageImage

Image

This might just be the most amazing special effect top coat I’ve ever used. It glided on seamlessly and really transformed the base coat. The above photos show Suede over Raucous.

Image

Raucous with and without Suede top coat

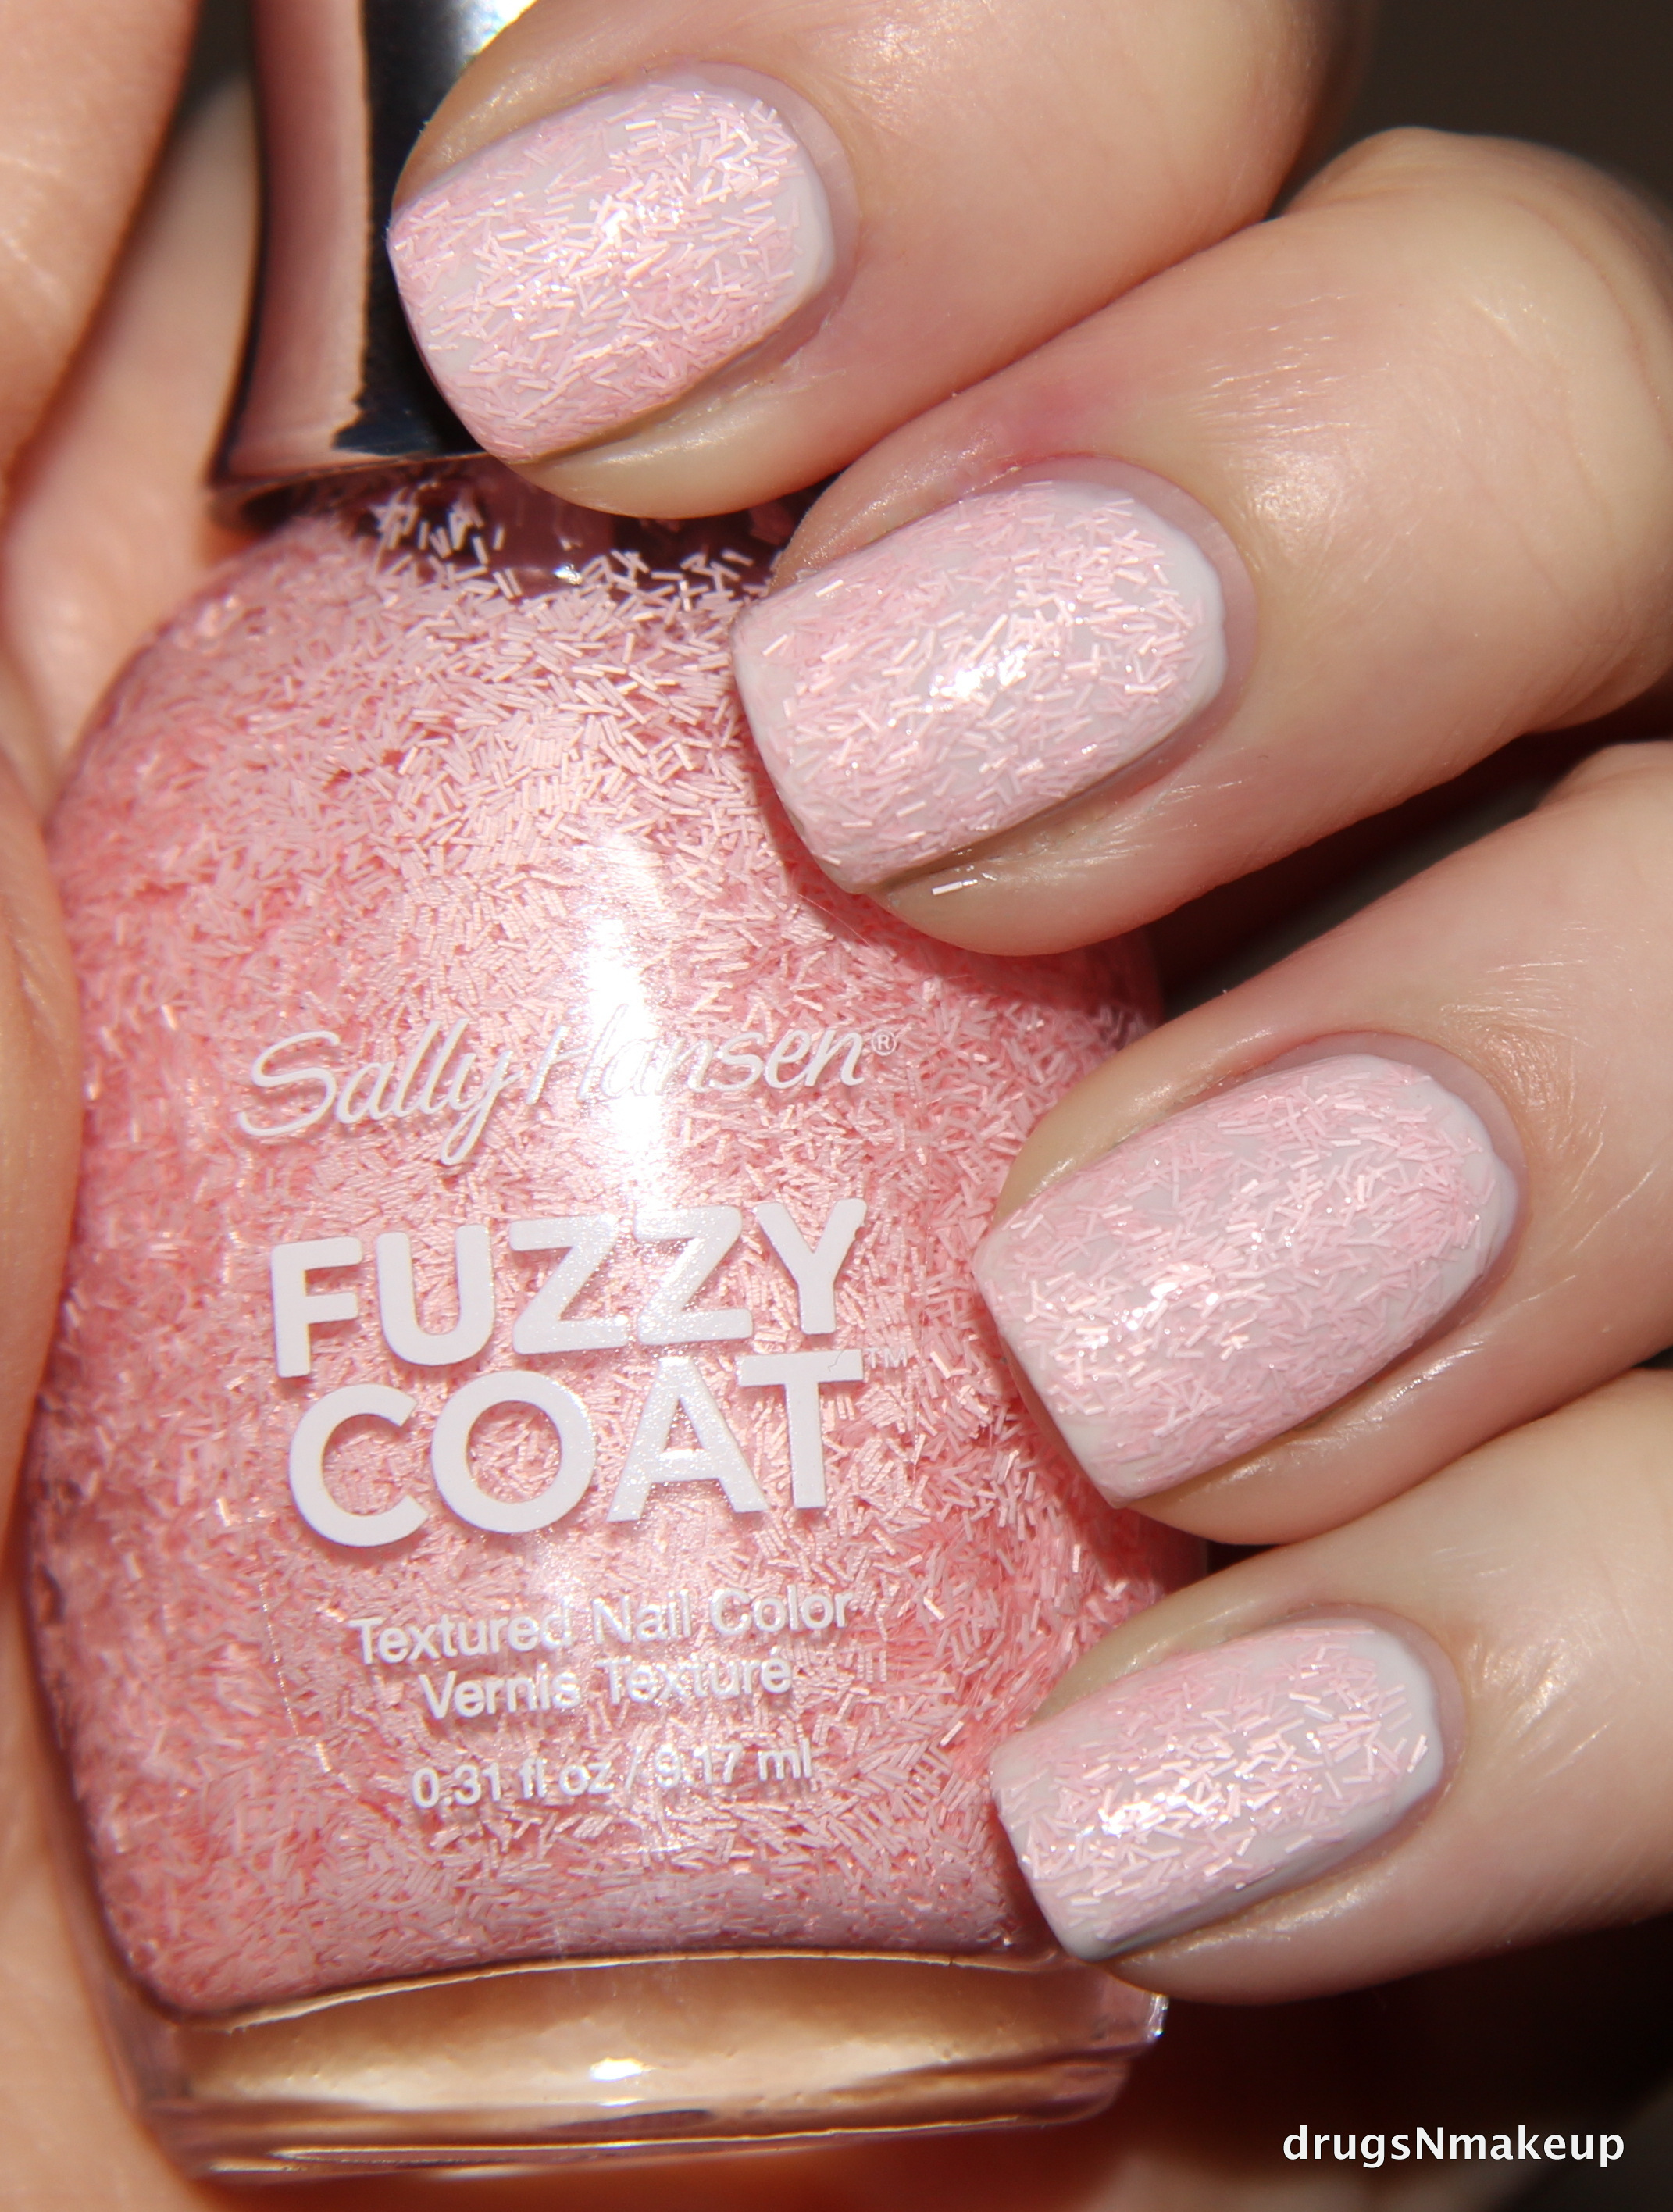
I also tried Suede over Age of Aquarius by color club. The effect was just as stunning over a cream base color.

Image

Age of Aquarius before and after Suede top coat

ImageImage

How gorgeous is that?! I will definitely be using Suede again and again.

I know you want to go browse the mentality online store, and as an added incentive, they are currently offering a sale of 20% off their already low prices with code FACTORY at check out. I’ve already tried it and it’s up and working!!

Mentality online shop: HERE

Mentality facebook page: HERE

Thanks for looking and let me know if you decide to try some Mentality polish! I promise you won’t be disappointed.

Screen Shot 2013-07-06 at 11.04.38 AM

*disclaimer-I received these 2 polishes free of charge, but my opinions are 100% honest and reflect my personal experience.

My Laser Hair Removal Journey: 2 weeks after the first treatment

You can read my Consultation and First treatment posts here if you missed them and want to catch up!

When I got my first treatment, I was told that the hair would fall out in 7-21 days. Today is day 14 and I wanted to let you know how things progressed. You’re not supposed to wax or tweeze the treated areas, but shaving is ok. I haven’t shaved the treated areas since I got my first treatment though, because I wanted to see the hair fall out!

I first noticed a generally stunting in the hair growth. Then I noticed around day 5 that a few hairs were coming out when gently tugged. More so at 7 days, and now at 14 days almost all the hair has fallen out, but not all of it. I have been “helping” the shedding process by exfoliating the areas during showers.

  • Sideburns- A lot of the hair has fallen out, but there is still some. This is the area that is very hard for me NOT to tweeze. In fact, I may have tweezed just a bit (shame on me!)
  • Underarms-My right underarm is almost completely smooth. I haven’t shaved since the treatment. My left underarm is almost smooth as well, except for 2 nickel sized patches. So I’m not sure if those areas were missed with the laser, or if they are just more stubborn than the other areas. I guess time will tell. I may have to break down and shave my left underarm.
  • Bikini area-It’s been fun to see the hair come out in this area. I would say 80% of it has fallen out. It’s a weird and strangely satisfying feeling.

So far so good. I’m a bit disappointed about the patches of hair on my left underarm because I do feel like they were missed somehow, but I will be sure to mention this to the technician at my next treatment which is set for late August. I haven’t noticed any irritation or discomfort in the treated areas whatsoever. I will update again in 2 weeks.

Screen Shot 2013-07-06 at 11.04.38 AM

Meet Jellie Polish

Let me preface this post by admitting that I am obsessed with jelly polishes. The way they glide over my nail, the way they show just a bit of nail line, they way they look…well like jelly!

Today I have some gorgeous swatches to show you guys from Jellie Polish, an up and coming Indie polish company! Nadia, who started Jellie polish, hand makes all her gorgeous jelly polishes. They are not for sale yet since she is just getting started, but hopefully they will be soon!! In the mean time you can visit her facebook page to see some more lovely colors she has created! She is an awesome person, so feel free to ask her any questions.

I have a huge crush on jelly based polishes (did I say that already?). My love interest started when the Texas collection by OPI came out. I was fairly new to the obsession of nail polish at that point and I’d never experienced a jelly polish before. I was hooked. Now when I see a jelly polish, I get butterflies! These lovelies were no exception!

Image

Ladies and gentlemen, feast your eyes on Purple Passion and Dr. Seuss!! I think my heart skipped a beat when I opened my nail mail and saw these beauties!! Jelly + glitter = sensory overload!! In the best way possible of course!

First let’s check out Dr. Seuss.

Image

Image

Dr. Seuss is AMAZING! It contains several different glitters. Let’s see if I can name them all: light bright blue hexes and squares, green hexes and squares, white hexes and squares, black hexes and squares, yellow hexes and squares, and red hexes and squares. Did I miss any? All these pretty glitters are swimming in a steel blue jelly base.

ImageImageImageImage

Applying this to my nails was a dream! I used 3 thin coats in these swatches along with OPI top coat. The glitter was very evenly dispersed in the base, so little shaking was required. I also found the glitters spread very evenly on my nail without much manipulation.

Purple lovers rejoice! I now give you Purple Passion.

Image

Image

This work of art contains (3?) different shades of purple glitters in both squares and hexes in a grape purple jelly base.

ImageImageImageImage

These swatches also show 3 coats of Purple Passion with OPI top coat. Application was the same as with Dr. Seuss, so pretty much awesome. I also love the square bottles that Nadia uses.

Image

Don’t forget to like the Jellie Polish facebook page and let Nadia know you saw her gorgeous polishes on my blog. ❤

If you like Nail art and want to view it or share it you can request to join this closed group run by Nadia. Nail Art Designs.

Screen Shot 2013-07-06 at 11.04.38 AM

Image

Multi-Blogger/Indie Polish Maker Giveaway Announced!!

My blogger buddy Nicole from Dipped in Lacquer is hosting a giveaway in honor of her 1 year bloggiversary. There will be a total of 11 winners and 3 of the prizes are open to international viewers as well! Mine included. I am giving away a $25 gift certificate to Llarowe that will be sent through your email.

Image

If you have never tried Indie polish, Llarowe is the perfect place to start! You can enter the giveaway by clicking below where it says click to reveal rafflecopter. Once you click the rafflecopter will be revealed! Good Luck!

Big thanks to Nicole for putting this all together and to all the other sponsors of this giveaway! Click HERE to visit Nicole’s blog to see all the official rules of this giveaway. 

Image


My Laser Hair Removal Journey: The first treatment.

If you missed my consultation post, you can view that here.

When I left off, I was saying that the lady who did my consultation asked if I wanted my first treatment right then! Of course I said yes!

I was sent back to the waiting room while I waited for the technician to come and get me. I didn’t even wait 5 minutes and she came and collected me and brought me to a treatment room. There was a big chair similar to a dentist chair but wider. It wasn’t super scary. She then showed me to an adjacent room where I took off everything except my bra. I also used the provided wipes to cleanse the areas where I would be having the hair removal. I was glad for this because even though I had showered before the consultation, I was sweating from my nerves. I know it’s kind of silly, but I didn’t want the technician to be able to smell me while she was doing the procedure, so I was glad for the provided cleaning supplies. I was given the option to either wear a paper gown, or to just use a paper coverup sheet. I decided on the gown and went back into the treatment room.

I approached my nervousness and impeding embarrassment by joking with the lady who did my treatment. It worked like a charm. I made her laugh, and we just chatted like we were friends. I immediately started to feel more at ease. I also took solace in knowing that she has performed this procedure before many times and seen just about everything. In case you can’t tell, I was very embarrassed about having the full bikini done. This was the thing that I was most nervous about.

The first thing she did after asking me a lot of questions about sun exposure and health history was to shave the areas to be treated. Yep, every single area. She started with my side burns, and used a special razor that collected the hair. After shaving an area she looked at the hair under the light to note the color of the hair. She informed me my underarm hair was light brown and my bikini area was a mix of light and medium browns and blonde. I was a bit disappointed in the blonde hair since blonde hairs don’t respond to the laser. I am hoping there was enough melanin in the hair to work!

After every area was shaved she did the lasering. This part was incredibly quick. She first marked the areas to be treated with a white eyeliner pencil. She told me the laser would feel like hot rubber bands popping my skin and that if I needed a break to tell her. She did my sideburns first and I hardly felt anything at all. It just felt like pulses of air and sounded like a “pop, pop, pop” every time the laser went off. Each side burn took maybe 6 pulses. Not uncomfortable in the least. Next, she did my underarms. Since the area was larger, it took longer, but still not painful. I felt it a bit more than I did on my side burns, but I wouldn’t consider it uncomfortable. Lastly was the most dreaded area, the full bikini area. I was sure this area would hurt, and I was partially correct. Most areas didn’t hurt at all and a few areas were mildly uncomfortable. There was just one area that made me jump out of my seat, but after 3 pulses it was done. After she did the entire front part, I had to flip over on my stomach to get the back part. That part was mildly embarrassing, but didn’t hurt at all. Then it was done.

After the lasering was done, she turned on the light to look at my skin. A red reaction is normal, as is some follicular swelling. She told me swelling at the hair follicle was a good thing. I did have a bit of redness and some swelling. The redness was gone by the time I reached the front door, and my skin felt as if nothing had been done to it at all. She put some clear aloe on the treated areas and then I got dressed. I made my appointment for my next treatment in 8 weeks and left with my goodie bag. I was so relieved it was done, and excited about a future with no hair. I was told to treat the treated areas like a mild sunburn and that the hair would fall out in 7-21 days.

My thoughts and tips: If I had known I was going to have my first treatment the same day as my consultation, I would have shaved all the areas to be treated myself. I will do that before my 2nd treatment. I also would have brought my own deodorant and maybe some body spray to use after the procedure.Because of my nerves I did sweat quite a bit. I also would have brought my own tissues to use after the procedure. The aloe was cold and wet and they didn’t have any tissues in the changing room to dry it off a bit. The technician did tell me I have a high pain tolerance. More than once she asked if I needed a break and I did not. She seemed surprised and almost bewildered at times that I wasn’t experiencing pain. If you feel you don’t do well with pain, I’d recommend some ibuprofen before the procedure. To me, the lasering did not hurt as bad as getting a tattoo. The most uncomfortable part of the procedure for me, was getting naked and being on display in front of a stranger, but I did get over that pretty quickly. It helped that my technician was a nurse, and that she’s done the procedure multiple times.

I will post an update 2 weeks after my initial treatment.

Screen Shot 2013-07-06 at 11.04.38 AM

Northern Star Polish: Purrfection and Sleepy Kitty Swatches

Image

Image

This is my first post on the Indie brand Northern Star Polish, but it sure won’t be my last! I want to give a bit of background info on Northern Star Polish before I delve into the swatches (which I am very happy with!) Kristin, who created Northern Star Polish, opened in March of 2012. She mixes each bottle of polish by hand, one bottle at a time. Stainless steel mixing balls are included in each bottle so it’s easy to mix the polish if needed, and Northern Star polish is also big-4 free and cruelty free!

Today I will be swatching 2 gorgeous shades that are currently available for purchase! 15 ml bottles retail for $9.00. Northern Star Polish also offers some amazing cuticle oil! Sampler packs range from $4.50-$5.50. I also love the unique bottles the polish comes in! I haven’t seen any quite like them.

Image

First up we have Purrfection.

Image

And this shade is certainly perfection.

Image

Purrfection is a rose pink base with white pearly flake glitter – opaque in two coats. No need to layer it over anything else!

ImageImageImageImage

Thoughts-I love this color!! The formula is on the thick side, but very easy to apply. The swatches show 2 coats with a top coat. I love the subtlety of the pearly sheen in this polish. It looks fairly subdued from far away, but when you get close, you see there is a lot more to Purrfection than you originally thought. This dried smoothly and quickly.

Next, check out the awesomeness of Sleepy Kitty. 

Image

This polish reminds me of those clear kitty balls that have bright colors inside them and roll around. So I think the sleepy kitty may be dreaming about them. 🙂

Kitten-dreams-mom-cat-hugs

Image

Sleepy Kitty is a glitter topper with a white shimmery base and filled with pink butterflies, pastels, white, and hop pink glitters.

ImageImageImage

Image

Thoughts-I knew Sleepy kitty would look good over Purrfection, but I didn’t know it would look THIS good. I love this combination!! The glitter was very easy to work with. The swatches show 2 coats over 2 coats of Purrfection. I shook the bottle between coats, but I found the glitter stayed VERY dispersed on it’s own.

Image

This is 2 coats of Sleepy Kitty over Nicole Give me the 1st Dance. So pretty!! I also think this would look good over pinks, blacks and whites!

I also got some Northern Star Cuticle oil to try and it was amazing!! It smelled so good and made my cuticles nice and smooth and moisturized. I actually brought it to work with me and applied it a few times since I have to wash my hands so much. It was a great experience and I definitely recommend it!

IMG_2847

Check out Northern Star Polish at the following places:

Northern Star Polish Etsy store HERE

Like Northern Star Polish on facebook HERE.

Screen Shot 2013-07-06 at 11.04.38 AM

*disclaimer-polishes were provided for review. Opinions are 100% accurate and reflect my personal experience with the polish.

Sally Hansen Swatches: Sugar and Fuzzy Coats

I wanted to share a few swatches of some new textured nail polish I tried by Sally Hansen. I received 2 of the Sugar Coat polishes and 1 of the Fuzzy Coat polishes.

Image

  • Sugar Coat Polish-limited edition

Candy for your nails! This special effect nail polish includes rich, sweet colors that dry to a surprising matte finish with a sugary 3D effect.

Image

Spare-A-Mint-Deep Teal color. I used 2 coats for the swatches. No top coat.

ImageImageImageImage

Image

Cotton Candies-Bright bubblegum pink. I used 2 coats for the swatches and no top coat.

ImageImageImage

Image

Thoughts-I really liked these Sugar coat polishes. They applied super easily and dried quick. They apply pretty smooth and the texture appears as they dry. I would like more of these.

  • Fuzzy Coat Polish

The ultimate outfit for your nails! Sally Hansen continues to lead the nail category with new 3D, unique textures inspired by fashion. Fuzzy Coat transforms nails with a 3D textured, woven fiber effect.

Image

Wool-lite-Light pink bars in a clear base. I used 3 coats over a white undie for the swatches.

ImageImageImageImage

Thoughts-application was pretty easy. The polish went on smoothly, but I feel like it doesn’t really look like the advertisements for this polish. It’s hard to get it to look as “fuzzy” as it does on Sally Hansen’s website.

Overall-I LOVED the sugar coat polishes, but I wasn’t as crazy about the fuzzy coat polish. Application for both was smooth and easy. The overall look and ease of drying time make the Sugar Coat polish my favorite.

Do you own any of these? If so what are your thoughts?

DE46853BF799E046593CF3DC75EFEEC7

*disclaimer-I received these from SH free to review. My opinions are 100% honest and reflect my personal experience with the polish.

Shimmer Polish: Review and Swatches

Image

Image

This is going to be a long post with lots of pictures because I’m reviewing 5 lovely Shimmer Polishes, but it will be totally worth it! I received 5 gorgeous polishes to review, but first I want to give you a bit of information about the polishes. Shimmer polish is based out of California. The Shimmer Polish Etsy shop opened in 5/12 and in just a little over a year has accumulated almost 1500 sales. So what’s the big deal? The big deal is the gorgeous-ness of this polish! It really is stunning. All the polishes are glitters, either in clear or light colored suspension bases. They are all named after ladies. A lot of polish companies do that, but the difference here is that all Shimmer polishes are named after real women that the creator personally knows. I like wearing polish named after a real person even if I don’t know them. It makes it feel more personal to me because I find myself making my own personal connections with the names.

The polishes retail for $12.00 a bottle and are 15 ml bottles. The bottles come beautifully labeled with their namesake and a color-coordinated heart jewel. I appreciate little details like this since I’m a collector and bottles such as these look beautiful displayed.

Image

Did I mention they were also a blast to photograph?

ImageImageImage

First up is Jennifer.

Image

Image

Soft Blue, Periwinkle Glitter Polish!

Image

Since these are glitters, I felt it was important to show them with and without flash, which I have done for each shade.

ImageImage

Swatches show Poshe base coat with 3 coats of Jennifer, followed by Seche top coat. The glitter in this polish is suspended in a clear base, but I achieved nearly opaque coverage in 3 coats. Jennifer sparkles with and without flash.

Next we have Leslie.

IMG_2832

2013-06-2612

Lavender, Periwinkle Glitter Polish

2013-07-02

IMG_2912

IMG_2862

Swatches show Poshe base coat with 3 coats of Leslie, followed by Seche top coat. The glitter in this polish is suspended in a clear base as well, but I did achieve nearly opaque coverage in 3 coats. I think Leslie looks the most different in flash vs no flash than any of the polishes I swatched. One of my favorites from the 5!!

Next, check out the gorgeous Eva.

IMG_2833


2013-06-267


Burgandy Red with a hint of Silver Sparkly Polish!
Fine microglitter

2013-07-021IMG_2923 IMG_2933This is the only shade I swatched that contained a color base. The base is a deep burgundy leaning red color with fine microglitter. Like the other swatches, these show 3 coats of Eva over Poshe base coat and under Seche top coat. Eva looked very vampy on my nails (which I love! Especially while watching True Blood). In person the finish resembles a sand textured polish. It dried semi-matte which was made more shiny by the addition of the top coat. You could skip top coat for a more matte appearance.

You still hanging in there? Good!

Next, check out Jasmine.

IMG_2834

2013-06-270

Aquamarine, light blue and green Glitter Polish!

2013-07-023IMG_2948 IMG_2962How gorgeous is Jasmine? I think this may be my favorite of the 5. The light green and aquamarine glitters are stunning in high and low lighting. Swatches show 3 coats over Poshe base and with Seche top coat on top.

I saved Nichole for last because the colors are patriotic and it’s almost July 4th. 🙂

*Nichole is 15% off in the etsy shop until July 7th in honor of Independence day!

IMG_2835 2013-06-268

Red, Silver and Blue Melange Glitter Polish!
Patriotic Shimmer!

2013-07-024IMG_3001

IMG_3003

Nichole, like the all the other polishes, was a dream to apply. Especially for being glitters, these really just glide right over the nail perfectly even. This is a gorgeous patriotic polish. Swatches show 3 coats over Poshe base and topped with Seche top coat. This was one of my favorites and it really got me psyched for July 4th.

Overall I love these polishes! I am a huge glitter nail polish fan, but since you can do so much with these in terms of layering and nail art, I think they will appeal to a large audience. The formula was great, applied smoothly, and dried quickly. The glitter is dense, and yet I hardly even had to shake them up to get full dispersion.

When you visit the Shimmer Polish Etsy shop, you can see a lot more swatches that feature more nail art which these polishes are great for! I am not super good at nail art (yet), so I opted to do swatches with just the polish itself with no base color. So keep in mind these polishes are superb for layering over different base colors, glitter gradients, stamping, and other nail art. The possibilities are endless and you can really let your creative self let loose.

I hope you’re interested in owning your own Shimmer Polish or just looking at some more gorgeous swatches! If you are you can visit the following locations:

Shimmer Polish: Etsy Shop

Shimmer Polish: Facebook Page

Shimmer Polish: Blog

Which shimmers do you like?